
Desserts
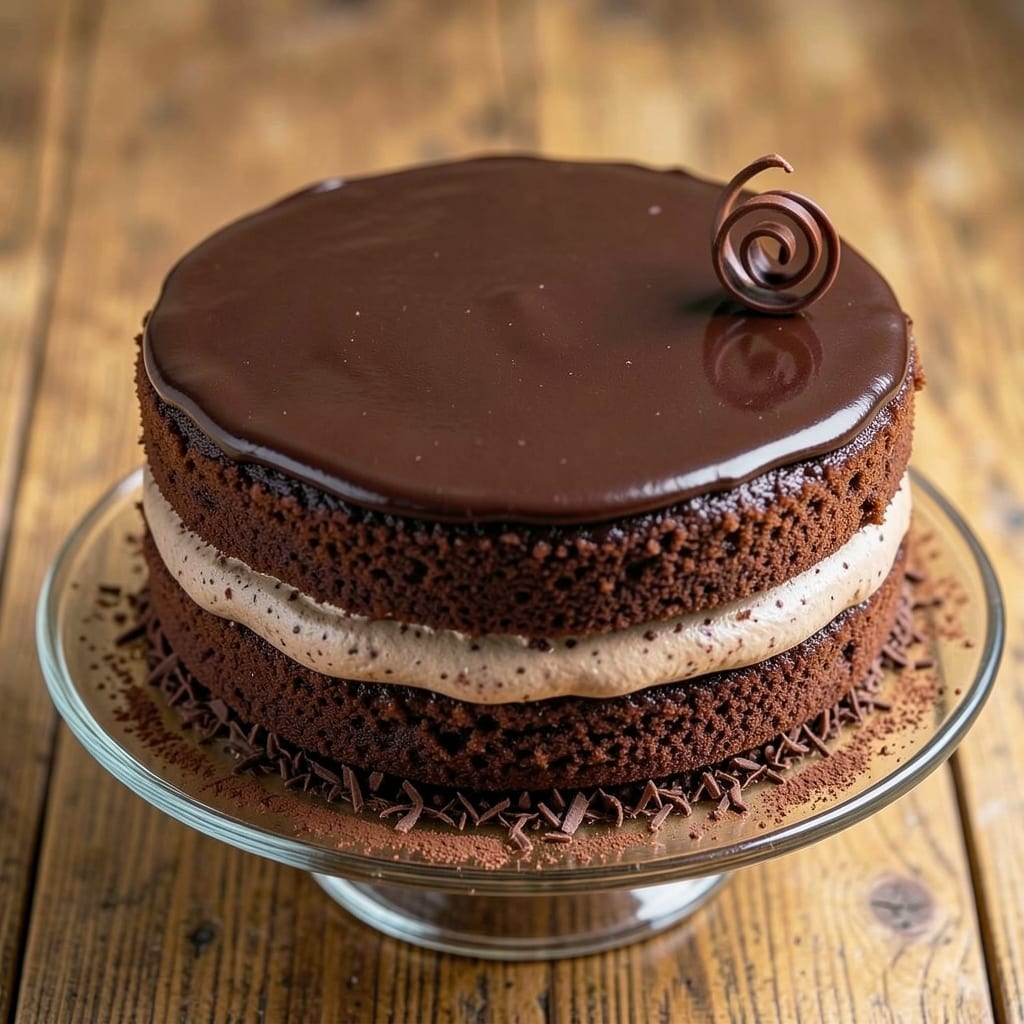
This All-American chocolate cake recipe delivers the perfect balance of rich cocoa depth and velvety vanilla swirls—just like your favorite classic diner slice. 💛 The secret lies in precise measurements and a gentle folding technique that keeps every layer impossibly moist without a hint of dryness. I've baked this version dozens of times for family gatherings, and it never fails to disappear faster than the plates hit the table.
The recipe builds on traditional American cake fundamentals: high-quality cocoa powder, pure vanilla extract, and a touch of espresso powder to enhance the chocolate flavor. What sets this apart is the vanilla bean swirl—thick ribbons of vanilla buttercream folded between layers—creating that signature marbled look you crave. The cake bakes up with a tender crumb and just enough structure to hold slices without crumbling.
By the time you're done, you'll have a three-layer masterpiece with golden-brown top crusts and fudgy centers that practically melt in your mouth. The frosting isn't just decoration—it's part of the experience, adding another layer of vanilla sweetness that ties everything together. This is the kind of cake that makes birthdays, holidays, and spontaneous celebrations feel extra special.
Whether you're serving it at a potluck or saving a slice for yourself, this recipe delivers restaurant-quality results with home-baker simplicity. The instructions walk you through every step, from mixing to baking to frosting, with tips to troubleshoot common cake challenges. Let's get started on creating this American classic.
Ingredients for all american chocolate cake
Twelve essential ingredients transform into a showstopping three-layer cake with melt-in-your-mouth moisture and signature vanilla swirls.
| Ingredient | Amount | Notes |
|---|---|---|
| All-Purpose Flour 🌾 | 3 ½ cups | Sifted for light texture |
| Unsalted Butter 🧈 | 2 ¼ cups | Room temperature, European style preferred |
| Granulated Sugar 🍚 | 2 ½ cups | White or light brown |
| High-Quality Cocoa Powder 🍫 | ¾ cup | Dutch-processed, like Hershey's Special Dark |
| Pure Vanilla Extract 🌿 | 2 tbsp | Bottled in glass, Madagascar or Tahitian |
| Espresso Powder ☕ | 1 tbsp | Instant, for chocolate depth |
| Large Eggs 🥚 | 6 whole | Room temperature, separated |
| Whole Milk 🥛 | 1 ½ cups | Cold, full-fat for richness |
| Baking Powder 🍞 | 1 ½ tsp | Double-acting, aluminum-free |
| Salt 🧂 | ½ tsp | Diamond Crystal preferred |
| Vanilla Bean Paste 🌿 | 2 tbsp | Seeds scraped for swirls |
| Powdered Sugar 🍚 | 4 cups | For buttercream, sifted |
| Heavy Whipping Cream 🥛 | 1 ½ cups | Cold, full-fat for stability |
The cocoa powder is non-negotiable—Hershey's Special Dark or Valrhona deliver that deep, velvety chocolate flavor. I always grab mine from Williams Sonoma or the baking aisle at Whole Foods. For the vanilla, Madagascar or Tahitian extract adds complexity that artificial can't match. The espresso powder might sound odd, but it enhances the chocolate without adding coffee taste—trust me, it works. Butter should be European-style if possible; it has higher fat content for richer layers. If you're using salt, Diamond Crystal dissolves more easily than table salt, so you won't get that grainy texture.
No vanilla bean paste? Pure vanilla extract plus a pinch of vanilla sugar works in a pinch, though the swirls won't be as dramatic. Running short on powdered sugar? Sifted granulated sugar is a decent sub, but it won't be as smooth. The heavy whipping cream needs to be cold and full-fat—don't use anything with stabilizers. For the milk, whole milk gives the best texture, but 2% works if that's all you've got. If you're making this ahead, room-temperature eggs are crucial—they emulsify better and create a lighter crumb. Pro tip: Separate the yolks and whites when you crack the eggs to avoid any bits in your meringue.
Store the cake layers wrapped in plastic wrap in the fridge for up to 3 days—the frosting keeps them fresh longer. The buttercream can be made a day ahead and stored in an airtight container in the fridge; just re-whip it before assembling. For the full experience, serve at room temperature—the contrast between the warm cake and cool frosting is what makes it special. I like to portion mine into individual slices for parties so they're easy to serve. The cake actually tastes better the next day as the flavors meld, so bake it a day before your event if possible.
Why You'll Love This Recipe
- No-Mix Hassle: I swear by this one-bowl method—just cream butter and sugar, fold in dry ingredients, and bake. No sifting, no extra bowls, no stress. The cocoa powder dissolves perfectly, so you won’t end up with gritty surprises.
- Rich Without Guilt: That high-quality cocoa powder and pure vanilla extract make it taste like a bakery’s secret recipe, but it’s not loaded with weird additives. The butter keeps it moist, and the sugar caramelizes just enough for that perfect balance of sweet and deep chocolate.
- Party or Pudding: Slice it for birthdays, pack it for picnics, or serve it warm with ice cream for a lazy Sunday. Honestly, I’ve even used it as a base for trifles—just layer with whipped cream and berries. It’s that adaptable.
- Budget-Friendly Luxury: Uses pantry staples (flour, sugar, butter) but delivers gourmet results. A single batch feeds a crowd, and leftovers? They last days if you store them right. My freezer’s always got a slice or two waiting for a chocolate craving.
Step-by-step instructions for three-layer chocolate cake with vanilla swirls
Here's my foolproof method for a showstopping chocolate cake that's moist, rich, and packed with vanilla swirls.
👨🍳 Step 1: Prepare the Cake Layers and Vanilla Swirls
Preheat your oven to 350°F and grease three 8-inch round cake pans, lining the bottoms with parchment paper. I like to use a mix of butter and flour for the greasing—just rub the pans with 1 tablespoon softened butter and dust with 1 tablespoon all-purpose flour, tapping out the excess.
In a large mixing bowl, whisk together the 3.5 cups all-purpose flour, 1.5 teaspoons baking powder, 0.5 teaspoon salt, 0.75 cup high-quality cocoa powder, and 1 tablespoon espresso powder. Sift this mixture directly into a stand mixer fitted with the paddle attachment to avoid lumps. Add the 2.5 cups granulated sugar, 2 tablespoons pure vanilla extract, and 6 whole large eggs at room temperature.
Mix on medium speed for 2 minutes until the batter is smooth and well combined. Scrape down the sides of the bowl with a spatula, then add the 2.25 cups unsalted butter (cut into tablespoon-sized pieces) and mix on low speed until just incorporated. The butter should be fully melted but not overworked. Finally, add the 1.5 cups whole milk and mix for another 30 seconds until smooth.
For the vanilla swirls, divide the batter evenly among the three prepared pans. Using a skewer or long spoon, make a well in the center of each layer. In a small bowl, mix 2 tablespoons vanilla bean paste with 2 tablespoons whole milk to create a thin paste. Spoon this mixture into the center of each cake layer, then gently swirl with the skewer to create marbled patterns. This ensures those beautiful vanilla flecks throughout each bite.
🔥 Step 2: Bake the Layers to Perfect Doneness
Place the pans on the middle rack of your oven and bake for 28-32 minutes, or until a toothpick inserted into the center comes out clean with just a few moist crumbs. I always check at the 25-minute mark because ovens vary—you want the edges set but the centers still slightly jiggly.
Here's the thing—don't overbake. The cake will continue cooking as it cools, and overbaking leads to dryness. When you remove the cakes from the oven, let them cool in their pans for 10 minutes before transferring to a wire rack to cool completely. This gradual cooling prevents cracking and maintains that perfect moist texture.
🥘 Step 3: Assemble the Cake With Chocolate Buttercream
While the layers cool, prepare the chocolate buttercream. In a medium bowl, beat the 1.5 cups heavy whipping cream (cold) with an electric mixer until soft peaks form. Gradually add the 4 cups powdered sugar (sifted) and mix until combined. Add the 2 tablespoons pure vanilla extract and 2 tablespoons vanilla bean paste, mixing until smooth.
In a separate large bowl, beat the 2.25 cups unsalted butter (softened) until creamy. Gradually add the cream mixture, mixing on low speed until fully incorporated. The buttercream should be light, fluffy, and pipeable. If it's too thick, add 1-2 tablespoons whole milk to reach the perfect consistency.
Once the cake layers are completely cool, level the tops if needed using a serrated knife. Place the first layer on a cake stand or plate, then spread a thin layer of buttercream on top. Add the second layer, repeating the buttercream step, and finish with the third layer. The key here is to keep the layers level—this ensures even slices and a professional finish.
🎂 Step 4: Frost and Decorate for Showstopping Results
Spread a thin "crumb coat" of buttercream over the entire cake, then chill in the refrigerator for 15 minutes. This step prevents crumbs from mixing into the final frosting layer. After chilling, apply the remaining buttercream, using an offset spatula to create smooth, even sides. For a classic look, I like to swirl the buttercream with a fork for texture.
To decorate, pipe rosettes or swirls around the edges using a piping bag fitted with a star tip. For extra flair, dust the top with a light layer of cocoa powder using a fine-mesh sieve. The cake should have a glossy finish with clean, sharp edges. Let it set in the refrigerator for at least 1 hour before slicing—this allows the flavors to meld and the frosting to firm up.
⏰ Step 5: Serve and Enjoy the Ultimate Chocolate Experience
Slice the cake using a long, sharp serrated knife. Dip the knife in hot water, wipe it clean, and make your first cut at a slight angle. This ensures clean slices without tearing the layers. Serve each piece on a plate with a dollop of extra buttercream on the side.
Each bite should deliver a perfect balance of rich chocolate flavor, subtle vanilla swirls, and moist crumb. The espresso powder enhances the chocolate depth, while the vanilla bean paste adds a luxurious aroma. For best results, serve at room temperature—this allows the cake to soften slightly and the flavors to truly shine.
Pro Tips For Making All American Chocolate Cake
- Melt Butter Slowly: Mixing cold butter into the sugar at room temperature creates air pockets—this cake’s secret texture. After three batches of dense, flat cakes, I learned to melt the butter just until fluid (about 10 seconds in the microwave) before mixing. It blends smoother and yields that signature tender crumb without overworking the batter.
- Sift That Cocoa: Lumpy cocoa powder ruins everything. I used to just dump it in, and the cake turned out streaky and uneven. Now I sift it twice—once with the dry ingredients, once with the flour—so it dissolves perfectly into the wet mix. No clumps, no regrets.
- Don’t Overmix the Batter: This cake’s magic fades fast once you start folding. After the first mix of wet and dry ingredients, stop as soon as it’s just combined—no streaks, no gray patches. Overmixing makes it tough, and I’ve learned the hard way that a few extra stirs turn a moist cake into a brick.
- Use a Thermometer: The oven’s "350°F" setting is a lie. My cake always came out either underdone or burned until I started checking the actual temperature with a thermometer. Aim for 335–340°F—hot enough to set the edges but gentle enough to keep the center fudgy. (Yes, even if your oven says "preheated.")
Troubleshooting this dish
Dense Layers?
If your cake layers feel too dense after baking, check your butter temperature—it should be softened but not melted. Overmixing the batter or using cold eggs can also compact the crumb. I’ve found that gently folding the vanilla swirl mixture into the batter (rather than stirring vigorously) keeps the texture light. For extra moisture, brush each cooled layer with 2 tbsp warm milk before frosting. 💫
Cracked Top?
Cracks usually mean your cake cooled too quickly or the oven wasn’t preheated properly. Always let cakes cool in pans for 10 minutes before removing, and avoid opening the oven door during baking. If cracks appear, use a thin layer of buttercream to "glue" the edges together before final frosting. For next time, try baking at 325°F instead of 350°F—this slows the rise slightly and reduces cracking.
Dry Cake?
Overbaking is the #1 cause of dryness—remove cakes when a toothpick comes out with moist crumbs, not completely clean. If your cake turns out dry, try adding 2 tbsp sour cream or Greek yogurt to the batter next time for extra moisture. For a quick fix, slice the cake and layer it with extra buttercream and whipped cream before serving to restore juiciness.
Frosting Too Thin?
Buttercream consistency depends on your cream’s fat content—if it’s too runny, chill the bowl for 10 minutes before whipping. For a thicker frosting, add powdered sugar 1 tbsp at a time until it reaches pipeable consistency. Pro tip: Use a hand mixer instead of a stand mixer for the cream stage—it traps more air, creating a lighter texture. If all else fails, dust the cake with cocoa powder instead of frosting for a rustic look.
Vanilla Swirls Disappeared?
This happens when the swirl mixture sinks instead of staying visible. To fix it, use a skewer to gently swirl the batter after adding the vanilla paste—don’t overmix. For extra drama, add 1 tsp cornstarch to the vanilla paste to thicken it slightly before swirling. If your cake is already baked, slice it horizontally to reveal hidden vanilla pockets before serving!
Crumbling Layers?
Uneven cooling or thin layers cause crumbling. Always level your cakes with a serrated knife before assembling, and use a thin layer of frosting (about ¼ inch) between layers to act as "glue." For extra stability, brush each layer with 1 tbsp apricot jam** before frosting—it adds moisture and helps bind the cake. If your cake crumbles during transport, wrap it tightly in plastic wrap and refrigerate until serving.
Nutrition facts
Frequently asked questions
Can I substitute Dutch-processed cocoa powder with natural cocoa?
Yes, but you'll need to adjust the acidity. Natural cocoa has a stronger chocolate flavor and requires 1 teaspoon baking soda added to the dry ingredients to neutralize its acidity. The cake will taste slightly different—more bitter and less smooth—but still delicious. For best results, use Hershey's Special Dark or Valrhona Dutch-processed cocoa as specified in the recipe.
How do I make this cake gluten-free?
Replace the all-purpose flour with a 1:1 gluten-free baking flour blend like Bob's Red Mill or King Arthur. For extra moisture, add 1 extra tablespoon of milk to the batter. You may also need to reduce the baking powder by 0.25 teaspoon since gluten-free flours often contain their own leavening agents. Test the cake immediately after baking—it may require 2-3 extra minutes in the oven.
Can I bake this cake in a 9-inch pan instead of 8-inch?
Yes, but you'll need to adjust the baking time and quantity. For a 9-inch pan, reduce each layer to ⅔ cup batter per pan and bake for 25-30 minutes. The layers will be slightly thinner, so they'll cool faster. To compensate, increase the buttercream slightly by ½ cup to maintain the same height. The total cake height will be about 3 inches instead of 4 inches.
Why does your recipe use espresso powder if it's not a coffee cake?
The espresso powder enhances the chocolate flavor without adding coffee taste—it's a baking secret! The acidity in coffee intensifies chocolate's natural depth, making each bite more complex. You'll only taste the subtle enhancement, not the coffee. For a stronger effect, use 1.5 teaspoons instead of 1 tablespoon, but don't exceed that amount or you risk a bitter aftertaste.
How far ahead can I make the buttercream?
You can prepare the buttercream 24 hours ahead and store it in an airtight container in the fridge. Before using, let it sit at room temperature for 30-45 minutes until soft enough to whip again. For best results, re-whip it with a hand mixer until smooth and fluffy. If it separates slightly, simply press it through a fine-mesh sieve to restore its texture. The cake layers can be wrapped individually and refrigerated for up to 3 days.