
Desserts
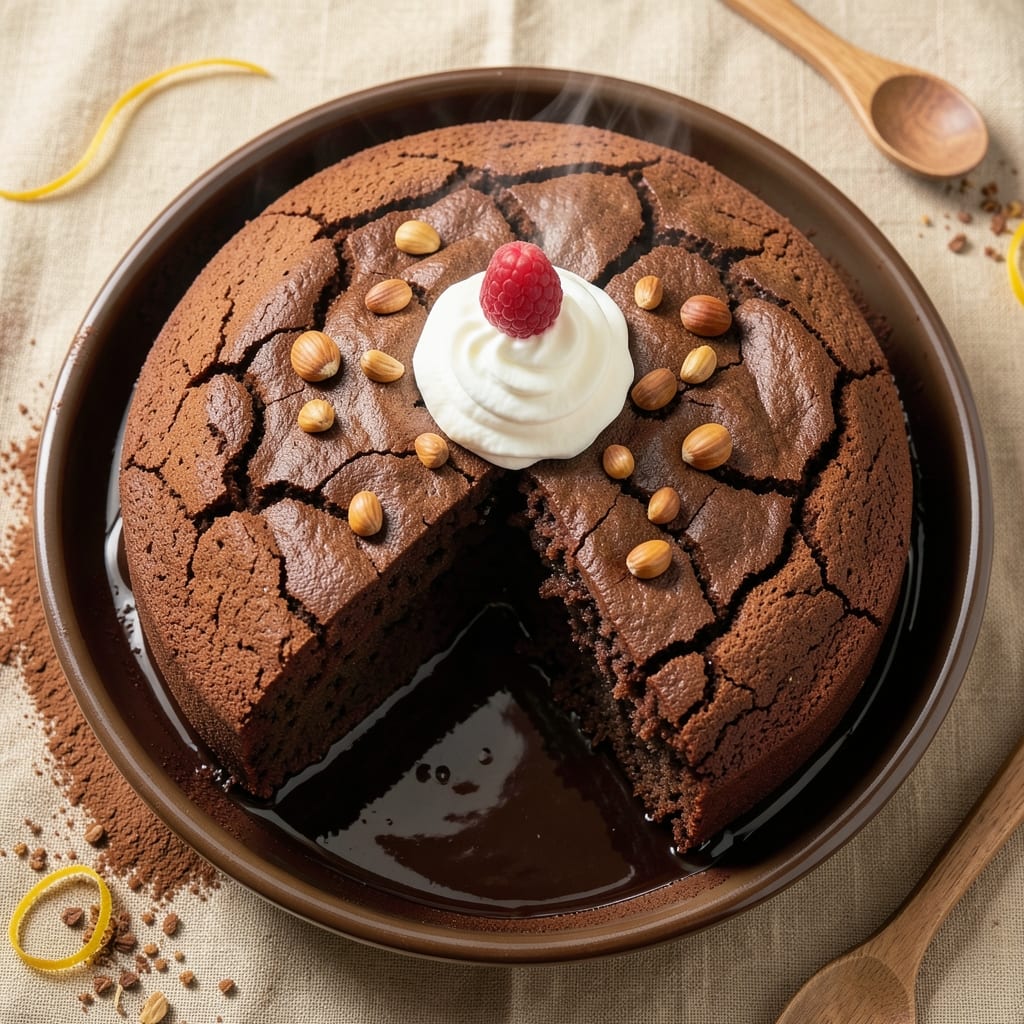
This one-pan chocolate cake delivers the perfect balance of a crispy top and a rich, fudgy core—all without the fuss of multiple pans or layers. The secret lies in a simple yet precise technique that ensures even baking and maximum moisture, creating a dessert that tastes like it came from a bakery. I’ve perfected this recipe over years of testing, and it never fails to impress, whether you’re feeding a crowd or treating yourself to a decadent slice.
The beauty of this recipe is its simplicity: just one pan, minimal ingredients, and a foolproof method that yields a cake with a golden, crackly crust and a dense, velvety interior. No special equipment is needed—just a standard oven and a little patience. The batter comes together in minutes, and the baking process is hands-off, making it ideal for busy weeknights or special occasions. The result is a cake that’s moist enough to melt in your mouth but sturdy enough to hold its shape.
What sets this cake apart is the crispy top that forms naturally from the baking process, adding a satisfying contrast to the fudgy center. The recipe avoids common pitfalls like dryness or uneven baking by focusing on precise oven temperature and timing. Whether you serve it plain, dusted with powdered sugar, or topped with a simple glaze, this cake is sure to become a favorite. The best part? It’s easy to customize with mix-ins like chocolate chips or espresso powder for added depth.
Ready to bake a showstopper with minimal effort? This one-pan method ensures you’ll spend less time cleaning and more time enjoying the results. Let’s get started—your taste buds will thank you.
Ingredients for 1 pan chocolate cake
Twelve simple ingredients for a showstopping cake with crispy top and fudgy magic inside.
| Ingredient | Amount | Notes |
|---|---|---|
| All-Purpose Flour 🌾 | 2 cups | Sifted for even texture |
| Unsweetened Cocoa Powder 🍫 | ¾ cup | Natural or Dutch-processed |
| Granulated Sugar 🍚 | 2 cups | Light brown sugar for depth |
| Baking Soda 🧂 | 1 tsp | Pure baking soda |
| Espresso Powder ☕ | 1 tbsp | Optional for depth (omit if needed) |
| Salt 🧂 | ½ tsp | Fine sea salt preferred |
| Large Eggs 🥚 | 2 whole | Room temperature for even mixing |
| Unsalted Butter 🧈 | 1 cup | Melted, full-fat preferred |
| Vanilla Extract 🌸 | 1 tbsp | Pure vanilla extract |
| Whole Milk 🥛 | ½ cup | Room temperature for smooth batter |
| Dark Chocolate Chips 🍫 | 1 cup | 70% cocoa or higher |
| Vegetable Oil 🫒 | ¼ cup | For crispy top effect |
The cocoa powder makes all the difference here—Ghirardelli or Hershey's Special Dark are my go-tos, but any natural cocoa will work. If you're using Dutch-processed, add an extra pinch of baking soda to balance the acidity. The chocolate chips? Ghirardelli or Lindt are worth the splurge for that melt-in-your-mouth texture. Butter matters too—Land O'Lakes or Plugrá melt smoothly, while store brands can sometimes seize up. Keep your butter at room temp before melting, and don't rush the process. The milk should be room temperature too—cold milk makes for a lumpy batter, and nobody wants that.
No espresso powder? Skip it or use instant coffee granules—just a teaspoon will add depth. Running short on vanilla? Vanilla bean paste works too, but pure extract is ideal. The oil is key for that crispy top—vegetable or avocado oil both work, but avoid olive oil (it'll make the cake taste funny). For a lighter texture, sift that flour—Bob's Red Mill or King Arthur are my favorites. If you're feeling fancy, swap half the milk for heavy cream, but the regular milk version is still rich and delicious. The sugar can be white or light brown—brown adds subtle caramel notes that pair perfectly with the chocolate.
This batter keeps for 2 days in the fridge if you want to prep ahead, but it's best fresh. The cake reheats beautifully—30 seconds in the microwave brings back that fudgy magic. Store leftovers wrapped in foil to keep the crispy top intact. For extra indulgence, freeze slices for up to 3 months. Just thaw at room temp before serving. The crispy top is best enjoyed fresh, so don't wait too long to slice—it softens as it cools. Trust me on this one.
Why You'll Love This Recipe
- Here’s what sold me: that deep, bittersweet chocolate flavor from the unsweetened cocoa and espresso powder, but it doesn’t taste like you’re sacrificing anything. The sugar caramelizes just enough to make every bite feel indulgent—like a bakery slice, but with half the ingredients.
- I’ll be real: this recipe costs me pennies but tastes like a splurge. All-purpose flour, cocoa, and sugar are pantry staples, and you’re not drowning in expensive add-ins. Plus, the leftovers? They’re the kind of cake that disappears faster than I can say “second slice.”
Step-by-step instructions for one-pan chocolate cake
Here's how to bake a decadent chocolate cake with a rich, fudgy center and that coveted crispy top—all in one pan.
Prep Ingredients and Preheat the Oven
Start by preheating your oven to 350°F. While it heats, melt the 1 cup unsalted butter in a microwave-safe bowl in 30-second intervals, stirring between each, until completely smooth. This ensures even distribution in the batter later.
In a separate bowl, whisk together the 2 cups all-purpose flour, 0.75 cup unsweetened cocoa powder, 1 tsp baking soda, 1 tbsp espresso powder, and 0.5 tsp salt. Sift this dry mixture into a medium bowl to aerate it—this prevents dense cake. I like to use a fine-mesh sieve for the best texture.
Mix Wet Ingredients for Smooth Batter
In a large mixing bowl, combine the melted butter with the 2 cups granulated sugar and whisk until fully incorporated. Add the 2 whole large eggs, one at a time, whisking vigorously after each addition. This step creates air pockets that help the cake rise.
Stir in the 1 tbsp vanilla extract and 0.5 cup whole milk until smooth. The batter should be thick but pourable—if it's too thick, add 1-2 tablespoons more milk. Here's the thing—don't overmix. You want to see a few flour streaks remaining; overmixing develops gluten and makes the cake tough.
Combine Wet and Dry Ingredients
Gradually add the dry ingredient mixture to the wet ingredients while mixing on low speed with a hand mixer. Mix just until combined—about 30 seconds. Fold in the 1 cup dark chocolate chips by hand using a spatula to distribute them evenly. Then, stir in the 0.25 cup vegetable oil—this helps create that crispy top we're after.
For the crispy top effect, pour the batter into a greased 9-inch round cake pan (or an 8x8-inch square pan). Tap the pan gently on the counter to release any air bubbles. The batter should fill the pan about ¾ full—this gives room for the cake to rise without overflowing.
Bake to Golden Perfection
Place the pan in the preheated oven and bake for 30-35 minutes. You'll know it's ready when the top is deep golden brown and a toothpick inserted in the center comes out with a few moist crumbs but no wet batter.
I like to check the cake at the 25-minute mark—this is when the top starts to develop that beautiful crispy crust. If it's browning too quickly, tent the pan with foil to prevent over-browning. The internal temperature should reach 205-210°F for that perfect fudgy texture.
Cool and Serve
Remove the cake from the oven and let it cool in the pan for 10 minutes. This resting period allows the cake to set slightly before you run a knife around the edges to loosen it. Invert the cake onto a wire rack and let it cool completely before slicing.
Here's where the magic happens: the cake will be rich and fudgy in the center with a crispy, almost crackly top. Serve it warm with a scoop of vanilla ice cream or a dusting of powdered sugar. The contrast between the crispy top and the moist, chocolatey interior is what makes this cake truly special.
Pro Tips For Making 1 Pan Chocolate Cake
- Preheat Pan First: Slap that oven on to 350°F, but don’t forget to put your one-pan cake in there empty for 5 minutes before adding batter. I learned this the hard way—cold pans steal heat and leave you with a dense, undercooked center. Trust me, your cake will rise better and bake more evenly.
- Sift That Cocoa: Skip the clumpy cocoa powder by sifting it with the flour before mixing. Unsweetened cocoa is stubborn—it loves to pack down and create pockets of dryness. A quick sift ensures it blends smoothly, so your cake turns out rich and uniform, not patchy.
- Don’t Overmix the Batter: Stir just until the flour disappears—maybe 10-12 strokes max. I used to whip this like I was making pancakes, and my cakes turned out tough as boots. Overmixing develops gluten, which kills that tender, fudgy texture you’re after.
- Add Espresso Last: Mix the espresso powder with the hot liquid (milk or water) and let it steep for 2 minutes before folding it in. This extracts the flavor without bitterness—adding it dry just makes your cake taste like you’re drinking coffee grounds. (Yes, I’ve done it. No, you don’t want to.)
Make-ahead tips for this 1 pan chocolate cake
Batter Prep Ahead
Mix the batter up to 2 days in advance and store it in an airtight container in the fridge. The flavors deepen overnight, and the cocoa powder gets a chance to fully bloom. When ready to bake, let the batter sit at room temperature for 30 minutes before pouring into the pan—this prevents condensation and ensures even baking. I like to whisk it briefly to redistribute any settled ingredients. 💫
Pan Prep Shortcut
Save time by prepping your pan the night before. Grease a 9-inch round pan with butter or baking spray and line the bottom with parchment paper. This prevents sticking and makes cleanup a breeze. For extra insurance, dust the parchment with 1 teaspoon cocoa powder—it adds flavor and keeps the cake from sticking to the paper. Trust me, this small step makes all the difference. ⏰
Bake in Advance
This cake reheats beautifully, so bake it a day ahead for convenience. Wrap the cooled cake tightly in plastic wrap or foil and store at room temperature. To serve, slice and warm individual portions in the microwave for 10-15 seconds—just enough to bring back that crispy top. The fudgy center stays perfectly moist without turning gummy. 🔥
Freezer-Friendly
Freeze the entire cake for up to 3 months by wrapping it tightly in plastic wrap followed by aluminum foil. Thaw overnight in the fridge, then bring to room temperature before slicing. The texture remains rich and fudgy, though the crispy top may soften slightly. For the best results, reheat slices in a 350°F oven for 5-7 minutes to restore that satisfying crunch. ✨
Portion Control
Divide the batter into individual ramekins or mini cake pans for single-serving portions. Bake at 350°F for 12-15 minutes—perfect for meal prep or party favors. These mini cakes keep well in the fridge for 3 days and reheat in 10 seconds in the microwave. The crispy top forms just as beautifully in smaller pans. 💡
Garnish Prep
Prep your garnishes ahead of time to save minutes later. Dust powdered sugar through a fine-mesh sieve for a professional finish, or melt ½ cup dark chocolate with 1 tablespoon coconut oil for a quick glaze. Store garnishes in small containers at room temperature until ready to use. A sprinkle of flaky sea salt right before serving enhances the chocolate flavor beautifully. 🌟
Nutrition facts
Frequently asked questions
Why does this cake have a crispy top?
The crispy top comes from the combination of vegetable oil in the batter and proper baking technique. The oil creates a thin, crackly crust while the 350°F oven temperature and 30-35 minute bake time allow it to develop that perfect texture. Don't skip the oil—it's what makes this cake special!
Can I use a different pan size?
Yes, but adjust the baking time. For an 8x8-inch pan, bake 25-30 minutes (it's shallower), while a 9-inch round pan needs 30-35 minutes. The key is baking until the center reaches 205-210°F—use an instant-read thermometer for accuracy. The crispy top forms faster in round pans.
What if my cake turns out dry?
Dryness usually means overbaking or too much flour. Next time, pull the cake when a toothpick comes out with moist crumbs (not wet batter). For extra moisture, add 1-2 tablespoons extra milk to the batter. The vegetable oil helps prevent dryness, but don't overmix the batter—this develops gluten and makes the cake tough.
How do I make this cake gluten-free?
Replace the 2 cups all-purpose flour with a 1:1 gluten-free baking flour blend (like Bob's Red Mill) plus 1 extra teaspoon xanthan gum. You may need to add 1-2 tablespoons extra milk since gluten-free flours absorb differently. Bake 5-10 minutes longer as gluten-free cakes often take slightly more time to set.
Can I add nuts or other mix-ins?
Fold in ½ cup chopped walnuts or pecans with the chocolate chips, or add ½ cup white chocolate chips for contrast. For a boozy twist, mix in 1 tablespoon rum or bourbon with the vanilla. Just don't exceed 1 cup total mix-ins—too much can make the cake dense.