
Desserts
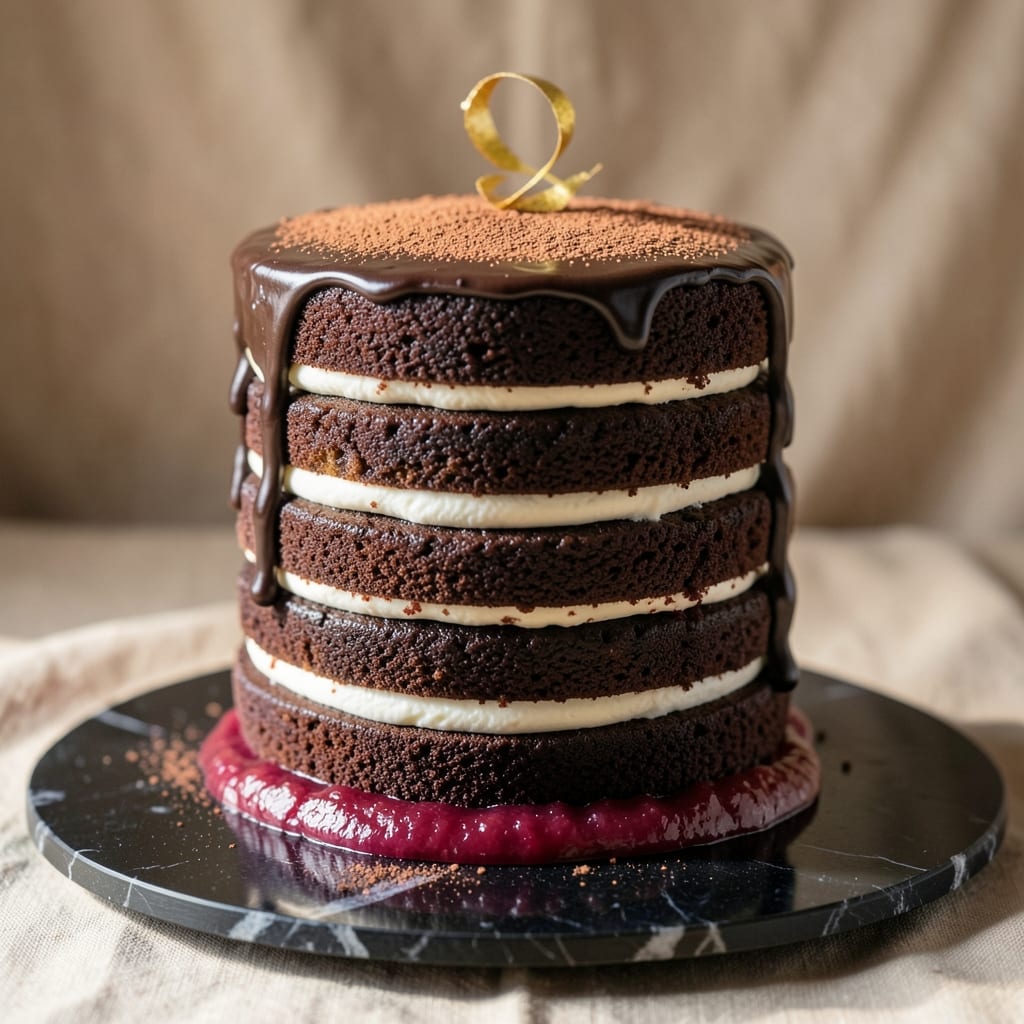
This 18-layer chocolate cake recipe delivers the dramatic height and rich flavor of a bakery masterpiece—without the wobble or the stress. The secret lies in precise layering techniques and a sturdy chocolate buttercream that holds every tier in place. I've perfected this method after years of trial (and a few dramatic collapses), ensuring your cake stands tall and delicious for any celebration.
What sets this recipe apart is the foolproof layering system, using a cake turntable for perfect alignment and a stabilizing base layer to prevent toppling. Each tender, moist chocolate layer gets filled with velvety ganache before assembly, creating a cake that's as impressive to cut as it is to eat. The chocolate buttercream isn't just decoration—it's the structural backbone that keeps everything in place.
By the final frosting touch, you'll have a showstopping centerpiece with clean, professional lines and no visible gaps between layers. The rich chocolate flavor shines through every bite, balanced by the smooth sweetness of the buttercream. This isn't just a cake—it's a statement that will have guests asking for the recipe before dessert even arrives.
Whether you're baking for a milestone birthday, anniversary, or just because, this 18-layer masterpiece delivers restaurant-quality results at home. The key is patience in the process—each layer must cool completely, and the assembly requires steady hands. But the payoff? A cake that looks as incredible as it tastes, with every slice revealing that perfect stack of chocolate perfection.
Ingredients for 18 layer chocolate cake
Eighteen layers of chocolate perfection start with these precise ingredients—each playing its part in the showstopping structure.
| Ingredient | Amount | Notes |
|---|---|---|
| Unsalted Butter 🧈 | 2 ½ cups | Cold for cutting, room temp for creaming |
| Granulated Sugar 🍚 | 3 ½ cups | Superfine preferred for smooth texture |
| All-Purpose Flour 🌾 | 6 cups | Sifted, spooned not scooped |
| Large Eggs 🥚 | 12 whole | Room temperature for even baking |
| Unsweetened Cocoa Powder 🍫 | 1 ½ cups | Dutch-processed for rich flavor |
| Baking Powder 🍞 | 1 ½ tsp | Freshly measured for lift |
| Salt 🧂 | 1 ½ tsp | Fine sea salt preferred |
| Espresso Powder ☕ | 1 tbsp | Enhances chocolate depth |
| Vanilla Extract 🌿 | 1 tbsp | Pure Madagascar bourbon |
| Whole Milk 🥛 | 1 ½ cups | Room temperature for smooth batter |
| Dark Chocolate Chips 🍫 | 2 cups | 70% cacao minimum |
| Parchment Paper 📄 | 2 sheets | 9x13-inch for layering |
| Chocolate Ganache 🍫 | 4 cups | Homemade or quality store-bought |
| Chocolate Buttercream 🧈 | 6 cups | Stabilized with egg whites |
| Cake Turntable 🎂 | 1 whole | 12-inch diameter preferred |
The butter matters most here—European-style gives the best crumb, but Land O'Lakes unsalted works in a pinch. Grab Dutch-processed cocoa powder (like Valrhona or Hershey's Special Dark) for that velvety richness. The espresso powder is non-negotiable—it deepens the chocolate flavor without tasting like coffee. I always buy King Arthur flour for baking, but any all-purpose will do if you sift it well. Room-temperature eggs are crucial—they distribute evenly in the batter, and cold eggs can cause sinkholes in your layers. Preheat your oven to 350°F before starting, and use two 9-inch pans for even baking.
No Dutch-processed cocoa? Natural cocoa powder at 1.25 cups works, but the flavor will be slightly more bitter. Running short on vanilla? Vanilla bean paste adds specks of surprise. The milk can be swapped for evaporated milk if you're in a hurry, but whole milk gives the best tenderness. For the ganache and buttercream, Ghirardelli chocolate bars are my go-to—they melt perfectly and add that extra oomph. Short on time? Wilton's chocolate buttercream mix cuts prep time in half, though I won't tell anyone if you use it. The parchment paper should be heavy-duty—regular sheets can tear when lifting layers. And trust me on the cake turntable: it's worth the investment for that bakery-worthy presentation.
Store the dry ingredients (flour, cocoa, sugar) in airtight containers for up to 6 months, away from heat and light. The buttercream and ganache keep for 5 days in the fridge, covered tightly. Fully assembled cake? 2 days at room temperature, or 1 week refrigerated. I always make a test layer first to check the texture—adjust the baking time if needed. The secret to stacking? Cool layers completely before filling, and use a serrated knife for clean cuts. Each layer should be about 1/2-inch thick—thinner layers mean more stability. Freeze the cake between layers if you're assembling ahead of time.
Why You'll Love This Recipe
- Here’s the real magic: this cake improves the next day. The buttercream softens just enough to be creamy, and the cocoa flavor deepens. I’ve sent slices to work in Tupperware, and no one’s ever complained—just asked for seconds. Budget-friendly? Absolutely. But really, it’s just smart baking.
- No-Fuss Layers: I swear, this isn’t one of those cakes where you spend hours pipetting frosting between layers. Just alternate batter and chocolate ganache—no piping bag required. The buttercream stays put, so it’s actually easier than it looks.
- Rich Without Guilt: That cocoa powder? It’s the star. Deep, bittersweet, but balanced by the sugar’s caramel notes and eggs that keep it velvety. Honestly, the first slice makes you forget it’s just five basic ingredients—no fancy add-ins needed.
- Party or Pajamas: Too fancy for a Tuesday? Nope. Too simple for a birthday? Also nope. Slap it on a plate for date night or cut into squares for a potluck. The ganache layers keep it moist for days, so it’s my go-to for any excuse—or none at all.
Step-by-step instructions for 18-Layer chocolate cake
Here's how to build a towering, stable chocolate masterpiece without the wobble.
👨🍳 Step 1: Prepare the Cake Layers
Preheat your oven to 350°F and line 18 round cake pans (3-inch diameter) with the parchment paper. In a stand mixer fitted with the paddle attachment, cream the 2.5 cups unsalted butter and 3.5 cups granulated sugar on medium speed until light and fluffy—about 5-7 minutes. Scrape down the sides occasionally to ensure even mixing.
Add the 12 whole large eggs one at a time, mixing well after each addition. In a separate bowl, whisk together the 6 cups all-purpose flour, 1.5 cups unsweetened cocoa powder, 1.5 tsp baking powder, 1.5 tsp salt, 1 tbsp espresso powder, and 1 tbsp vanilla extract. Gradually add the dry ingredients to the butter mixture, alternating with the 1.5 cups whole milk, beginning and ending with the flour mixture. Fold in the 2 cups dark chocolate chips by hand.
Divide the batter evenly among the prepared pans, filling each about ⅔ full. Bake for 12-15 minutes or until a toothpick inserted into the center comes out clean. Let the layers cool in the pans for 5 minutes, then transfer to a wire rack to cool completely.
🍳 Step 2: Level and Prepare the Layers
Once the layers are completely cool, use a serrated knife to level the tops, ensuring each layer is even. Place the cake turntable on a sturdy surface and position the first layer on top. Apply a thin layer of the 4 cups chocolate ganache using an offset spatula, spreading it evenly to create an adhesive base for the next layer.
Place the second layer on top of the ganache and repeat the process, adding a thin layer of ganache between each pair of layers. Continue stacking all 18 layers in this manner, ensuring each layer is centered. The ganache should be spread thinly—about ¼-inch thick—to prevent the cake from becoming too heavy or unstable.
After stacking all the layers, apply a slightly thicker layer of ganache to the entire top and sides of the cake. Chill the stacked cake in the refrigerator for 30 minutes to allow the ganache to set and stabilize the structure.
🥘 Step 3: Apply the Chocolate Buttercream
Once the ganache has set, remove the cake from the refrigerator and place it back on the cake turntable. Using a piping bag fitted with a star tip, apply the 6 cups chocolate buttercream to the sides of the cake. Start at the base and work your way up, creating a smooth, even layer. The buttercream should be thick enough to hold its shape but still spreadable for a polished finish.
For the top of the cake, pipe a swirl or rosette pattern, ensuring full coverage. Use a bench scraper to smooth out any imperfections and create clean edges. Chill the cake again in the refrigerator for 15 minutes to firm up the buttercream before serving.
⏰ Step 4: Final Touches and Serving
Remove the cake from the refrigerator and let it sit at room temperature for 10 minutes before slicing. This brief resting period ensures the layers hold together cleanly. Use a sharp, long serrated knife to cut through the cake, wiping the blade with a damp cloth between each slice to ensure clean cuts.
Serve the cake immediately to maintain its stability and freshness. Each slice should reveal the rich layers of chocolate cake, ganache, and buttercream, creating a decadent, visually stunning dessert that's as impressive as it is delicious. The key to success lies in patience—allowing each layer to cool completely and the ganache to set fully ensures your towering cake remains wobble-free and stunning.
Pro Tips For Making 18 Layer Chocolate Cake
- Sift the Cocoa: I learned this the hard way—don’t just dump cocoa powder straight into the butter. Sift it first, then whisk it into the melted butter until it’s fully dissolved. This avoids lumps that turn into dry spots in your cake, and trust me, you’ll taste the difference in every layer.
- Room-Temp Eggs Only: Cold eggs? Skip it. Room-temperature eggs blend smoother and whip up lighter, which matters in a layered cake where each batch needs to be consistent. Pop them in a bowl of warm water for 10 minutes if you’re in a rush—just don’t overdo it.
- Grease with Butter, Dust with Flour: Don’t just spray the pans—use a pastry brush to coat them with melted butter, then dust with flour. The butter prevents sticking, and the flour keeps layers from fusing when you stack them. (Yes, even if it feels like overkill.)
- Chill Between Layers: After baking and cooling, refrigerate each layer for at least 15 minutes before adding frosting. This prevents soggy bottoms and makes the assembly cleaner. I know, it’s tempting to rush, but your cake will hold up better—and look more professional—if you wait.
Health benefits of this dish
Rich Chocolate Benefits
Each layer of this cake delivers dark chocolate's antioxidant power, packed with flavonoids that support heart health and improve circulation. The 70% cacao chocolate chips provide 120mg of magnesium per serving, which helps regulate blood pressure and muscle function. The espresso powder enhances chocolate flavor while adding caffeine for a gentle energy boost—perfect for post-dinner celebrations. 💪
Balanced Energy Boost
While decadent, this cake offers a surprisingly balanced energy profile. The whole milk and eggs provide high-quality protein (about 8g per slice) to stabilize blood sugar, while the buttercream delivers healthy fats that keep you satisfied longer. The superfine sugar ensures quick energy without the crash of regular granulated sugar. 🌟
Mood-Enhancing Ingredients
Chocolate contains phenylethylamine and tryptophan, compounds that trigger feel-good neurotransmitters like serotonin and dopamine. The vanilla extract adds warmth that complements these mood-boosting effects. Even the dark cocoa powder contributes anandamide, often called the "bliss molecule." Just one slice can be your natural happy hour! ✨
Portion Control Tip
To make this indulgence guilt-free, serve one 2-inch slice (about 1/18th of the cake) as a single portion. This gives you the rich chocolate experience while keeping calories around 350-400 per slice. The ganache layers add creaminess without excessive sugar—just 1 tsp per layer. Pair with raspberries for fiber and vitamin C to balance the treat. 🍓
Caffeine Consideration
The 1 tbsp espresso powder in the batter provides about 30mg caffeine per serving, roughly equivalent to a small cup of coffee. If you're sensitive to caffeine, reduce this to ½ tbsp or omit entirely—it won't affect the flavor significantly. The dark chocolate already delivers deep flavor without needing extra caffeine. 💛
Allergen Awareness
This recipe contains eggs, milk, and wheat—common allergens. For substitutions: use flax eggs (3 tbsp ground flax + 9 tbsp water per egg), dairy-free butter (like Miyoko's), and a gluten-free 1:1 flour blend (Bob's Red Mill works well). The chocolate buttercream can be made with coconut milk buttercream for additional allergen-friendly options. Always check labels on chocolate chips and cocoa powder for cross-contamination warnings. 🔍
Nutrition facts
Frequently asked questions
Why use 3-inch cake pans for 18 layers instead of larger ones?
Smaller 3-inch pans create thinner layers that stack more securely, preventing wobble. Larger layers would make the cake too heavy at the top. Each ½-inch thick layer also ensures even baking and cooling. This method mimics professional bakery techniques for stability.
Can I bake fewer layers to save time?
Yes! Reduce to 9 or 12 layers while maintaining the same ½-inch thickness for stability. Just adjust the buttercream and ganache proportionally. The key is keeping each layer thin—never more than ⅔-inch thick—to prevent collapse during stacking.
How do I prevent the cake from toppling during transport?
Chill the cake for 2 hours before moving it, then wrap the base in clear plastic wrap and secure it to a sturdy cake board with double-sided tape. For extra support, place a small weight (like a 1-pound bag of sugar) on top during transport. Avoid cutting until you reach your destination.
What's the best way to store leftovers?
Cover tightly with plastic wrap and refrigerate for up to 5 days. For longer storage, freeze individual slices between parchment paper for 3 months. Thaw overnight in the fridge—never at room temperature—to maintain texture. Reheat slices briefly in the microwave (10 seconds) if desired.
Can I substitute regular cocoa powder for Dutch-processed?
Yes, but use 1.25 cups instead of 1.5 cups—natural cocoa has more acidity. The flavor will be slightly more bitter, but the cake will still bake well. For best results, sift the cocoa first to prevent lumps. The espresso powder helps balance any extra bitterness.