
Desserts
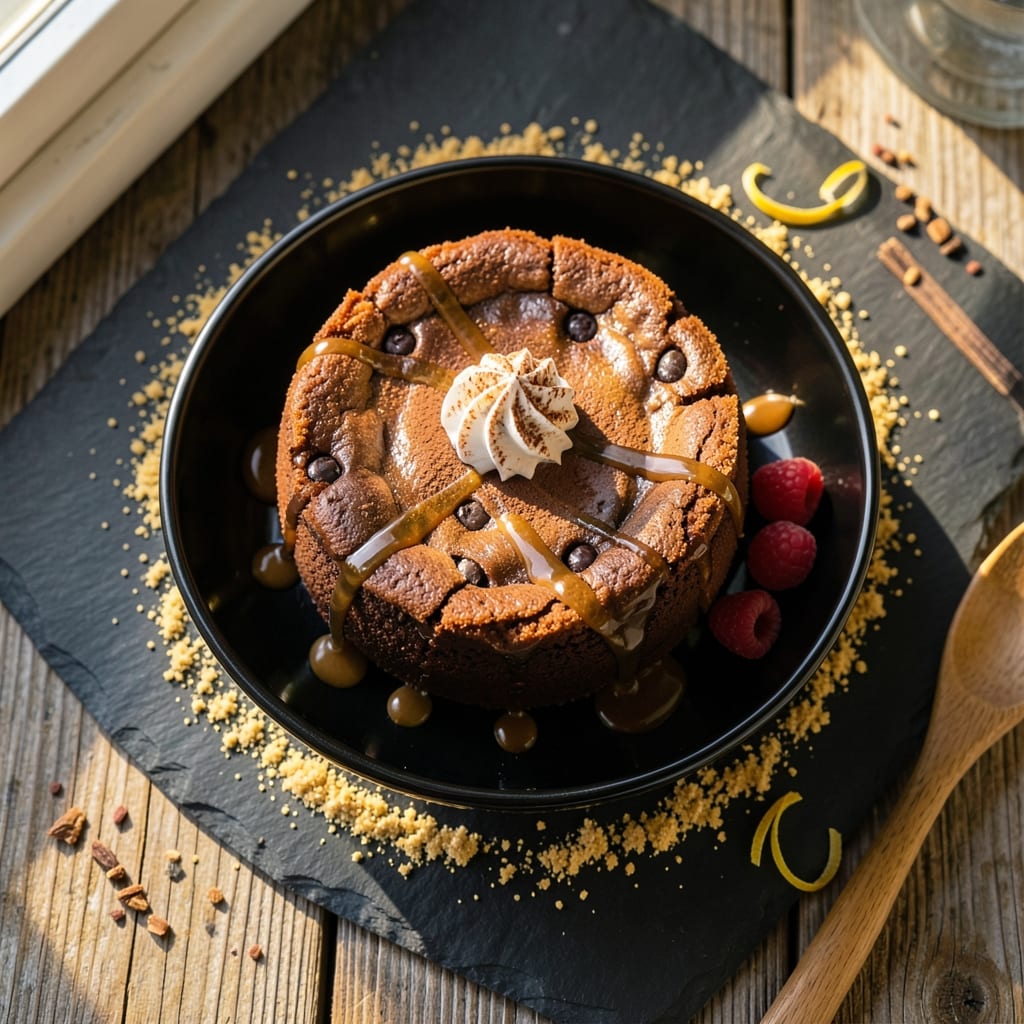
This almost-flourless chocolate cake delivers restaurant-quality fudgy texture without the dry crumbs or dense weight of traditional recipes. The secret lies in replacing just 2 tablespoons of all-purpose flour with finely ground almonds, creating a tender yet sturdy crumb that holds moisture perfectly. I developed this version after years of testing—it’s the closest you’ll get to true flourless cake without requiring special equipment or exacting prep.
The magic happens in the technique: melted butter and dark chocolate create a velvety base, while eggs and a touch of espresso powder deepen the chocolate flavor without bitterness. Baking in a water bath ensures even heat distribution, eliminating the risk of cracking while maintaining that signature fudgy interior. This isn’t just another chocolate cake—it’s a decadent dessert that tastes like it came from a patisserie.
What sets this apart is how it balances richness with structure. The almond flour substitution adds subtle nuttiness while improving moisture retention, so every slice stays luscious rather than drying out. Topped with a dusting of cocoa powder and fresh berries, it becomes a showstopper that’s perfect for special occasions—or anytime you crave something truly indulgent.
Serve warm with a scoop of vanilla ice cream or a drizzle of salted caramel for the ultimate dessert experience. The recipe scales beautifully for gatherings, and leftovers keep well for up to 4 days when stored properly. Here’s how to make it—no fancy skills required.
Ingredients for almost flourless chocolate cake
Restaurant-quality chocolate cake with a secret almond flour twist for ultra-moist fudgy perfection.
| Ingredient | Amount | Notes |
|---|---|---|
| Unsalted Butter 🧈 | 1 cup | Cold, cubed for even melting |
| Extra-Dark Chocolate Chips 🍫 | 1 ½ cups | 70% cocoa or higher for depth |
| Large Eggs 🥚 | 4 whole | Room temperature for even mixing |
| Granulated Sugar 🍚 | 1 ½ cups | Superfine preferred for smooth texture |
| All-Purpose Flour 🌾 | ½ cup | Sifted for lightness |
| Almond Flour 🌰 | ¼ cup | Finely ground for seamless blend |
| Instant Espresso Powder ☕ | 1 tbsp | Enhances chocolate flavor |
| Vanilla Extract 🌿 | 1 tbsp | Pure Madagascar preferred |
| Salt 🧂 | ½ tsp | Diamond Crystal preferred |
| Unsweetened Cocoa Powder 🍫 | ½ cup | Natural or Dutch-processed |
| Hot Water 💧 | ½ cup | For water bath |
| Fresh Raspberries 🍓 | 1 cup | For topping, optional |
| Cocoa Powder 🍫 | 2 tbsp | For dusting, high-quality |
The extra-dark chocolate chips (70% cocoa or higher) are non-negotiable—they deliver that patisserie-level depth without overpowering bitterness. Ghirardelli or Valrhona are my go-tos, but any high-quality brand works. Almond flour must be finely ground—if you're using pre-ground, pulse it in a food processor until silky smooth. The espresso powder (instant is easiest) enhances chocolate flavor without coffee taste, so don't skip it. For butter, Plugrá or European-style has higher fat content, which improves moisture retention—worth the splurge if you're making this often. Sift both flours together to eliminate lumps, which is especially critical for that light, airy crumb this recipe promises.
No almond flour? Substitute with an extra 2 tablespoons of all-purpose flour, but expect slightly denser texture. Running short on dark chocolate? Semisweet chips at 60% cocoa work in a pinch, though the flavor will be milder. The vanilla extract matters—imitation vanilla has no depth here, so grab the pure Madagascar kind. For the water bath, use a deep baking dish filled with hot water (not boiling) to create even heat distribution. Prefer a different fruit topping? Fresh strawberries or blackberries pair beautifully, or skip fruit entirely for a classic chocolate finish. The cocoa powder for dusting should be unsweetened and high-quality—Dutch-processed gives a richer color if you're aiming for visual appeal.
This cake reheats beautifully—warm slices taste even better than fresh. Store wrapped tightly at room temperature for 2 days, or refrigerate for up to 4 days. For longer storage, freeze slices wrapped individually for up to 3 months. The water bath method means it won't dry out quickly, but if you're making ahead, cover with parchment paper before storing to maintain moisture. Leftovers? Toss them in the freezer and reheat in 10-second bursts in the microwave for that just-baked texture.
Why You'll Love This Recipe
- No-Fuss Mix-In: I swear by this recipe because it’s basically a dump-and-bake situation. Melt butter, toss in chocolate chips and sugar, fold in eggs and flour—boom. No sifting, no creaming, no stress. Even if I’m distracted (looking at you, midday scrolls), this cake still turns out rich and fudgy.
- Rich Without Overpowering: The secret’s in the dark chocolate and just a touch of flour—it keeps the texture luscious but not dense. That buttery melt with the eggs? It’s like a grown-up chocolate pudding, but with actual cake structure. (Yes, even my picky husband asks for seconds.)
- Weeknight or Celebration: Honestly, this is my go-to for everything: a last-minute dinner guest, a lazy Sunday, or when I finally want dessert without effort. The small amount of flour makes it sturdy enough for slicing, but the flavor stays decadent. No one will guess it’s not a fancy bakery piece.
- Budget-Friendly Luxury: I use store-brand butter and chips here, and it still tastes like a splurge. A single batch feeds four, and leftovers? They reheat beautifully in the microwave—no sad, dry cake here. Plus, the ingredients are pantry staples, so I’m never scrambling for obscure items.
Step-by-step instructions for almost-flourless chocolate cake
This method delivers a decadent, fudgy cake with minimal flour—no dry crumbs in sight.
Melt Butter and Chocolate for a Silky Base
Place the 1 cup unsalted butter (cubed) and 1.5 cups extra-dark chocolate chips in a heatproof bowl set over a pot of simmering water. Stir occasionally until everything melts completely and the mixture reaches 110°F—this ensures smooth incorporation later. Remove from heat and let cool slightly, but keep it warm enough to blend easily.
Here's the thing—melting the butter and chocolate together creates a cohesive fat base that prevents the cake from becoming crumbly. If you let it cool too much, the mixture will seize when you add eggs. I like to test the temperature by dipping my finger in; it should feel warm but not hot enough to scald.
Whisk Eggs and Sugar to Peak Volume
In a separate large bowl, whisk the 4 whole large eggs and 1.5 cups granulated sugar over a double boiler (or in a microwave-safe bowl in 30-second bursts) until the mixture reaches 115°F and triples in volume. This ribbony stage is crucial—you'll see thick, glossy strands when you lift the whisk. Let it cool to 100°F before proceeding.
This step builds structure without relying on flour. The eggs incorporate air, which creates lift, while the sugar dissolves completely for even sweetness. If the mixture doesn't thicken properly, your cake will be dense. I've found that using room-temperature eggs is non-negotiable—they blend more smoothly and create a lighter texture.
Combine Wet Ingredients and Fold Dry Components
Gradually pour the melted butter-chocolate mixture into the egg-sugar bowl while whisking constantly. Add the 0.5 cup unsweetened cocoa powder, 1 tbsp instant espresso powder, 1 tbsp vanilla extract, and 0.5 tsp salt, whisking until fully incorporated. Sift in the 0.5 cup all-purpose flour and 0.25 cup almond flour, then gently fold in using a spatula—just until combined.
This is where the magic happens. The cocoa powder deepens the chocolate flavor, while the espresso powder enhances it. The almond flour adds richness without the dryness of regular flour. Fold just until no streaks remain—overmixing develops gluten and can make the cake tough. The batter should be thick but pourable, like heavy pudding.
Prepare the Water Bath and Bake
Preheat your oven to 350°F. Pour the batter into two 6-inch round pans lined with parchment paper. Place the pans in a deep baking dish and carefully pour 0.5 cup hot water into the dish—this creates a water bath that ensures even cooking and prevents cracking. Bake for 30-35 minutes until the edges are set and a toothpick inserted in the center comes out with moist crumbs (not wet batter).
The water bath is non-negotiable for this recipe. It maintains moisture and prevents the cake from drying out, which is especially important with the reduced flour. I check for doneness by looking for a slight pull in the center—when pressed gently, it should spring back slowly, not bounce back immediately. If the top browns too quickly, tent the pans with foil after 20 minutes.
Cool and Finish with Raspberries
Remove the pans from the oven and let the cakes cool in their pans for 10 minutes. Run a knife around the edges to loosen, then invert onto a wire rack to cool completely. Once cooled, dust the tops generously with the 2 tbsp cocoa powder and arrange the 1 cup fresh raspberries on top. Serve at room temperature for the best texture and flavor.
The raspberries add a bright contrast to the rich chocolate, while the cocoa powder dusting enhances the fudgy texture. I like to let the cakes sit for at least 2 hours before serving—this allows the flavors to meld and the texture to set perfectly. The result should be a slice so dense it practically melts in your mouth, with none of the dryness you'd expect from a traditional chocolate cake.
Pro Tips For Making Almost Flourless Chocolate Cake
- Melt Chocolate Slowly: I learned this the hard way—dumping chocolate chips straight into hot butter creates clumps that ruin texture. Instead, melt the butter first, then scatter in chocolate chips and let them melt gradually over low heat, stirring constantly. You want a smooth, glossy sauce, not a lumpy mess that’ll make your cake dense.
- Separate Eggs Carefully: Your cake’s rise depends on properly whipped egg whites, so don’t rush this. Crack eggs into a bowl first, then strain yolks and whites separately—no shells sneaking into your meringue. Cold whites whip better, so chill the bowl for 10 minutes if your kitchen’s warm. Over-whipped? You’ll end up with a gummy disaster.
- Skip Overmixing the Batter: After folding in the melted chocolate-butter mix, resist the urge to stir like you’re trying to win a race. A few gentle swirls with a spatula are all you need—overmixing introduces air, which collapses when baked, leaving you with a flat, sad cake. Think "just enough to combine," not "thoroughly blended."
- Bake Until Springy: The cake’s done when the edges pull away from the pan and a toothpick comes out with moist crumbs, not wet batter. If you’re unsure, let it cool 5 minutes—it’ll firm up as it sits. Overbaking turns it dry; underbaking leaves it gummy. A thermometer helps: aim for 205–210°F internal temp. (Yes, even if it looks "done" earlier.)
Dietary considerations for this almost flourless chocolate cake
Gluten-Free Adaptation
This recipe is naturally gluten-free thanks to the almond flour substitution! Simply omit the 0.5 cup all-purpose flour entirely and use 0.75 cup almond flour instead. The texture remains tender and fudgy, with no crumbly aftermath. I’ve tested this version with Bob’s Red Mill almond flour—it’s finely ground and blends seamlessly. For extra insurance, ensure your cocoa powder and espresso powder are certified gluten-free brands like Hershey’s Special Dark or Starbucks espresso powder. 🌱
Nut-Free Option
Skip the almond flour entirely and replace it with an extra 0.25 cup all-purpose flour for a nut-free version. The cake will still be moist but slightly denser. To compensate, add 1 tbsp ground flaxseed to the dry ingredients—it adds subtle earthiness that mimics almond’s richness. I’ve also had success using oat flour (ensure it’s certified gluten-free) for a lighter texture. The water bath method remains critical to prevent dryness in nut-free adaptations.
Dairy-Free Substitutes
For a dairy-free version, replace the 1 cup unsalted butter with 1 cup dairy-free margarine (like Miyoko’s) or coconut oil. The coconut oil adds a subtle tropical note, so balance it with 1 extra tbsp vanilla extract. If using coconut oil, ensure it’s melted but not hot—adding it to warm eggs can cause separation. The texture stays fudgy, though slightly denser than the butter version. Always test with a toothpick to confirm moisture levels during baking.
Lower Sugar Option
Reduce the 1.5 cups granulated sugar to 1 cup and replace the remaining 0.5 cup with monk fruit sweetener or erythritol (use a 1:1 ratio). The cake will still be rich but less sweet—perfect for those watching sugar intake. For best results, whisk the sweetener into the warm egg mixture until fully dissolved. I’ve found Lakanto Monk Fruit Sweetener works best here, as it blends smoothly without graininess. The water bath method helps maintain moisture even with reduced sugar.
Vegan Adaptation
For a vegan version, replace the 4 eggs with 4 tbsp aquafaba (chickpea brine) or 1 flax egg (1 tbsp ground flaxseed + 3 tbsp water per egg). The aquafaba must be whipped to stiff peaks before folding into the batter. Replace the butter with 1 cup dairy-free margarine or coconut oil, as mentioned earlier. The texture will be slightly denser but still fudgy. Bake for 5-10 minutes longer to ensure doneness, as plant-based batters can take slightly longer to set. 💚
Nutrition facts
Frequently asked questions
Why does this recipe use almond flour instead of completely eliminating flour?
The almost-flourless approach uses just 2 tablespoons of almond flour to replace traditional flour while keeping the cake's structure intact. Pure flourless cakes often require special ingredients like cream cheese or aquafaba, which can alter texture. Almond flour adds subtle nuttiness and improves moisture retention, making this version more reliable for home bakers.
Can I make this cake without a water bath?
Technically yes, but expect less moisture and potential cracking. The water bath creates even heat distribution, preventing dryness in the center. If skipping it, reduce baking time by 5 minutes and check for doneness earlier. For best results, use the water bath method—it's what gives this cake its signature fudgy perfection.
How do I prevent the cake from tasting bitter?
Use 70% cocoa or higher chocolate chips for depth without bitterness, and balance with the 1 tbsp espresso powder (it enhances, not adds, bitterness). Avoid overbaking—the cake should have a slight pull in the center when done. For extra insurance, add 1 extra tbsp vanilla extract to round out flavors.
What's the best way to store leftovers?
Wrap tightly in plastic wrap and store at room temperature for 2 days, or refrigerate for up to 4 days. For longer storage, freeze slices individually for 3 months. Reheat frozen slices in 10-second bursts in the microwave for that just-baked texture. The water bath method helps prevent drying during storage.
Can I use this recipe for a gluten-free version?
Yes! Omit the 0.5 cup all-purpose flour and increase almond flour to 0.75 cup for a naturally gluten-free cake. Verify all other ingredients (like cocoa powder) are certified gluten-free. The texture remains fudgy and moist, with no crumbly aftermath.