
Desserts
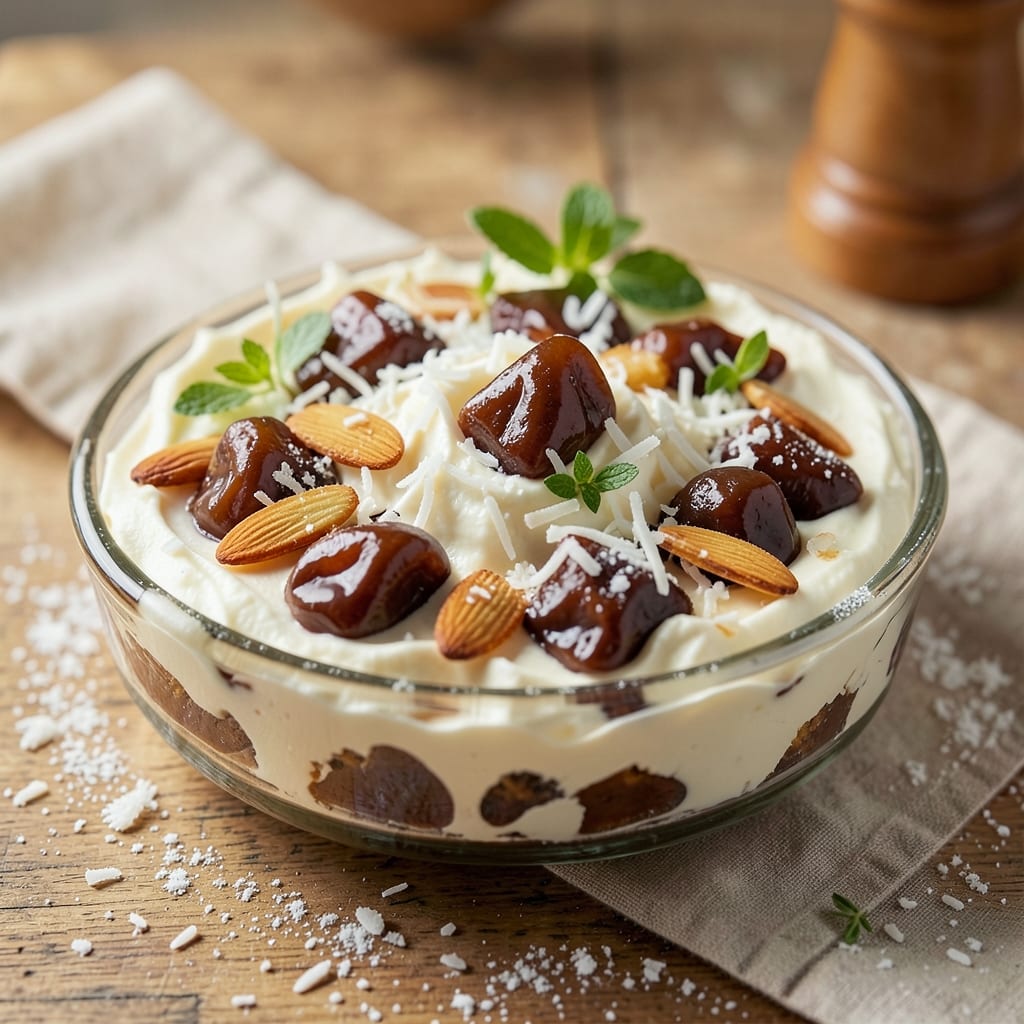
This Almond Joy cake filling recipe delivers the iconic tropical flavors you love in every bite—rich chocolate, toasted coconut, and almond crunch—without requiring a single oven turn-on. 💛 The secret lies in a no-bake swirl that transforms simple ingredients into a velvety, nutty filling perfect for layering between cake or swirling into frosting. I developed this after craving that nostalgic Almond Joy taste in dessert form, and it’s become a crowd-pleaser at every gathering.
The magic happens with a toasted coconut-almond mixture that adds texture and depth, while melted chocolate binds everything together into a smooth, spreadable filling. You’ll need just 5 key ingredients and 15 minutes of prep time, making it ideal for last-minute desserts or ahead-of-time baking. The filling stays firm enough to pipe between cake layers but melts beautifully when warmed, creating that signature Almond Joy experience.
What makes this recipe special is its versatility—use it as a filling for layered cakes, swirl it into buttercream frosting, or even stuff it into cupcakes for a tropical twist. The toasted coconut adds a satisfying crunch, while the almonds bring a subtle sweetness that balances the chocolate. Serve with whipped cream or extra toasted coconut for garnish, and you’ll have a dessert that tastes like a vacation in every bite.
Perfect for birthdays, holidays, or just because, this filling is foolproof and delivers restaurant-quality results at home. The no-bake method ensures no stress, and the flavors are so rich, you’ll want to make it all the time. Let’s get started on creating your dream Almond Joy-inspired dessert!
Ingredients for almond joy cake filling
Five simple ingredients plus a few pantry staples transform into this dreamy no-bake filling.
| Ingredient | Amount | Notes |
|---|---|---|
| Semi-Sweet Chocolate Chips 🍫 | 1 ½ cups | High-quality for best flavor |
| Unsalted Butter 🧈 | ½ cup | Cubed for easy melting |
| Sweetened Shredded Coconut 🥥 | 1 cup | Unsweetened works too |
| Sliced Almonds 🌰 | ½ cup | Toasted for enhanced flavor |
| Heavy Cream 🥛 | 1 cup | Cold for proper whipping |
| Powdered Sugar 🍚 | ½ cup | Sifted for smooth texture |
| Vanilla Extract 🌿 | 1 tsp | Pure extract preferred |
| Salt 🧂 | ¼ tsp | Fine sea salt preferred |
| Coconut Oil 🫒 | 1 tbsp | For extra richness |
The chocolate chips make or break this filling, so Ghirardelli or Guittard are my go-tos—they melt beautifully. Unsalted butter adds richness without overpowering the sweetness, and I always grab the European-style kind for that extra flavor. Shredded coconut should be fresh, not that dried-out stuff from the back of the pantry. Trader Joe's has the best quality at a great price, but any brand works if it's labeled 'unsweetened' or 'sweetened' depending on your preference. Sliced almonds? Toast them in a dry pan for 2-3 minutes until golden—they add a whole new dimension of flavor.
No heavy cream? Whipped coconut cream works in a pinch, though it's slightly lighter. Substitute powdered sugar with confectioners' sugar if that's what you have—just sift it well. Running out of vanilla extract? Almond extract at half the amount gives a similar nutty depth. For the coconut oil, any brand works, but make sure it's refined—not the virgin kind, which can add a coconut flavor that clashes with the other ingredients. The filling stays firm at room temperature, so no need to refrigerate until you're ready to use it.
This filling keeps for up to 2 weeks in the fridge, perfectly portioned for cake layers. For longer storage, freeze it in an airtight container for up to 3 months. I like to pipe it into a parchment-lined loaf pan for easy slicing later. If you're not using it all at once, just re-whip it briefly with a hand mixer to restore that silky texture. The toasted almonds and coconut stay crunchy even after refrigeration, so no need to worry about sogginess.
Why You'll Love This Recipe
- Five-Ingredient Magic: This isn’t one of those recipes where you’re hunting for obscure spices or techniques. Just melt butter with chocolate, fold in coconut and almonds, then whip in cream—no fancy steps, no stress. Honestly, I’ve made it with my hands tied behind my back (okay, maybe not, but close).
- Tropical Crunch Perfection: That first bite? It’s like biting into a warm Almond Joy bar but richer—thanks to the heavy cream—and with a satisfying crunch from the toasted almonds. The coconut doesn’t overpower; it just enhances, like the perfect vacation in food form.
- Filling for Everything: Slather it between cake layers, spoon it over ice cream, or stuff it into cupcakes. I’ve even used it as a glaze for pound cake (yes, really). It’s the kind of filling that makes you think, “Why haven’t I done this sooner?”—because it works anywhere.
- Leftovers That Last: Make a double batch and store it in the fridge for up to a week. The flavors only get better as the coconut softens and the almonds mellow out. Between us, I’ve had this filling cold, room temp, and even reheated—it’s that reliable.
Step-by-step instructions for Almond Joy cake filling
Here's how to create this dreamy, no-bake filling that tastes like a bite of Almond Joy candy.
🍳 Step 1: Melt Butter and Chocolate for a Silky Base
In a medium heatproof bowl, combine the 0.5 cup unsalted butter and 1.5 cups semi-sweet chocolate chips. Place this bowl over a saucepan filled with 1-2 inches of simmering water, making sure the bottom of the bowl doesn't touch the water. Stir occasionally until the mixture is completely melted and smooth—about 5-7 minutes. The chocolate should look glossy and fully incorporated, with no streaks remaining.
Here's the thing—melting chocolate properly prevents those dreaded streaks in your finished filling. If you see any graininess, strain the mixture through a fine-mesh sieve to ensure absolute smoothness. Let the melted mixture cool slightly to room temperature (about 10 minutes) while you prepare the other ingredients. This prevents the cream from curdling when you combine them later.
👨🍳 Step 2: Whip the Cream to Stiff Peaks
In a separate, chilled mixing bowl, pour the 1 cup cold heavy cream. Using a hand mixer or stand mixer with the whisk attachment, beat the cream on high speed until it forms stiff peaks—when you lift the whisk, the cream should hold its shape for several seconds. This usually takes about 2-3 minutes. The cream should look thick and glossy, almost like soft whipped butter.
I always chill my bowls beforehand because cold surfaces help stabilize the cream. If your kitchen is warm, consider placing the bowl in the freezer for 10 minutes before whipping. Don't rush this step—under-whipped cream won't hold its shape in the filling, and you'll end up with a runny, sad dessert instead of that perfect cloud-like texture.
🥘 Step 3: Fold in Sugar, Vanilla, and Salt
Add the 0.5 cup powdered sugar, 1 tsp vanilla extract, and 0.25 tsp salt to the whipped cream. Using a spatula, gently fold these ingredients together until just combined—about 10-12 strokes. You want to maintain as much air as possible in the cream, so avoid overmixing. The mixture should look like light, fluffy clouds with no dry spots of powdered sugar remaining.
This is where the magic happens—those tiny sugar crystals dissolve just enough to sweeten the cream without weighing it down. The salt enhances all the flavors, balancing the sweetness perfectly. If you notice the cream starting to deflate, don't worry—it'll come back when you add the melted chocolate mixture in the next step.
🥘 Step 4: Combine Chocolate and Cream for Ultimate Richness
With the spatula, gently fold about ⅓ of the melted chocolate mixture into the cream to lighten it. Then, add the remaining chocolate in two more additions, folding just until combined after each addition. This gradual incorporation prevents deflating the whipped cream. The final mixture should be smooth, glossy, and thick—like a cross between pudding and mousse.
Here's a pro tip: If your mixture looks too thick, you can gently warm it for 10-15 seconds in the microwave to loosen it slightly. But be careful—you don't want to melt the chocolate again. The filling should hold its shape when spooned but still be spreadable enough to pipe or swirl between cake layers.
🍳 Step 5: Add Toasted Coconut and Almonds for Texture
In a dry skillet over medium heat, toast the 0.5 cup sliced almonds for 2-3 minutes until fragrant and lightly golden. Remove from heat and immediately stir in the 1 cup sweetened shredded coconut and 1 tbsp coconut oil. Let this mixture cool for 5 minutes—this prevents the coconut from making the filling too wet.
Now, gently fold the toasted coconut-almond mixture into the chocolate-cream base using the spatula. Be careful not to overmix—just combine until evenly distributed. The filling should have visible flecks of toasted coconut and almonds throughout. If it looks too thick, you can stir in 1-2 teaspoons of heavy cream to loosen it slightly. This no-bake filling is now ready to swirl between cake layers or spoon over ice cream!
Pro Tips For Making Almond Joy Cake Filling
- TOAST THE COCONUT: I learned this the hard way—raw coconut tastes bland and clings like wet cardboard. Spread the shredded coconut on a baking sheet and toast it at 350°F for 5-7 minutes, stirring once. The edges should turn golden, not burnt, or it’ll taste bitter. This step makes the filling taste like a real Almond Joy, not a sad imitation.
- MELT CHOCOLATE GENTLY: Skip the microwave and melt the chocolate chips in a double boiler or microwave in 20-second bursts, stirring between each. Overheating seizes chocolate, and you’ll end up with grainy, sad filling. If you’re impatient like me, use a heatproof bowl over a pot of barely simmering water—it takes longer but guarantees smooth, glossy chocolate every time.
- CHOP ALMONDS SMALLER: Store-bought sliced almonds are fine, but if you’re using whole almonds, pulse them in a food processor until they’re tiny—about ¼-inch pieces. Big chunks stay crunchy and sink to the bottom like rocks. The filling should have a consistent texture, so don’t skip this if you’re starting from scratch.
- WHISK CREAM COLD: Heavy cream straight from the fridge whips faster and holds its shape better. If it’s warm, chill it for 10 minutes first—this isn’t the time to rush. Fold it into the chocolate mixture last, and use a spatula to cut through the cream like you’re making meringue. Overmixing turns it into butter, and nobody wants that.
Best sauces and condiments for this almond joy cake filling
Coconut Cream Swirl
This tropical-inspired sauce transforms your filling into a decadent centerpiece. Whip ½ cup coconut cream (chilled) with 2 tbsp powdered sugar until soft peaks form. Gently fold it into your finished filling using a spatula, creating marbled swirls. For extra flair, pipe ribbons of the filling onto a plate, then drizzle the coconut cream mixture over the top. 🥥
Chocolate Ganache Drizzle
Elevate your dessert with a glossy chocolate ganache. Melt ½ cup semi-sweet chocolate chips with 2 tbsp heavy cream over simmering water, then cool to 100°F. Drizzle this over your cake layers or spoon it alongside the filling. For a richer version, add 1 tsp coconut oil to the ganache. This adds a professional touch that pairs beautifully with the nutty filling.
Toasted Coconut Syrup
Create a caramelized coconut syrup by simmering ½ cup sweetened shredded coconut with ¼ cup water and 2 tbsp brown sugar for 5 minutes. Strain through a fine-mesh sieve, then cool. Drizzle this syrup over your cake slices or use it to moisten the filling before assembling layers. The syrup adds a subtle caramelized depth that complements the almond and chocolate flavors.
Whipped Cream Garnish
No Almond Joy-inspired dessert is complete without whipped cream! Whip 1 cup heavy cream with 2 tbsp powdered sugar and ½ tsp vanilla extract until stiff peaks form. Pipe rosettes onto your cake or spoon dollops alongside the filling. For extra indulgence, toast 2 tbsp sliced almonds and sprinkle them over the whipped cream. This classic pairing makes every bite feel special.
Caramelized Banana Glaze
Add a fruity twist by caramelizing 1 ripe banana with 1 tbsp butter and 1 tbsp brown sugar until golden. Cool the mixture slightly, then strain to remove banana chunks. Brush this glaze over cake layers or drizzle over the filling. The banana's natural sweetness enhances the coconut and almond flavors while adding a silky texture.
Nutrition facts
Frequently asked questions
Can I make this filling without coconut oil?
Yes! Simply omit the 1 tbsp coconut oil—it adds richness but isn't essential. For extra moisture, you can stir in 1 tsp extra heavy cream instead. The filling will still have great texture and flavor without it.
How do I store leftover filling?
Keep unused filling in an airtight container in the fridge for up to 2 weeks. For longer storage, freeze it for 3 months. Thaw overnight in the fridge before using—never microwave directly, as it can make the coconut soggy. Stir gently to restore texture if needed.
What's the best cake to pair with this filling?
This filling works beautifully with vanilla or spice cakes (like cinnamon or cardamom). For maximum flavor contrast, try a light pound cake or angel food cake—their neutral taste lets the tropical filling shine. Avoid overly sweet cakes that might compete with the coconut-almond flavor.
Why did my filling turn grainy?
Graininess usually happens when chocolate doesn't melt completely or the cream gets overmixed. Next time, strain melted chocolate through a fine-mesh sieve, and fold ingredients gently. Also ensure your cream is cold before whipping. If it happens, try warming the filling gently (10 seconds in microwave) to restore smoothness.
Can I make this filling dairy-free?
Replace butter with coconut oil or dairy-free margarine, use coconut cream instead of heavy cream, and ensure chocolate chips are dairy-free. The toasted coconut-almond base will still provide that signature crunch and flavor. Just check all ingredients for hidden dairy.