
Desserts
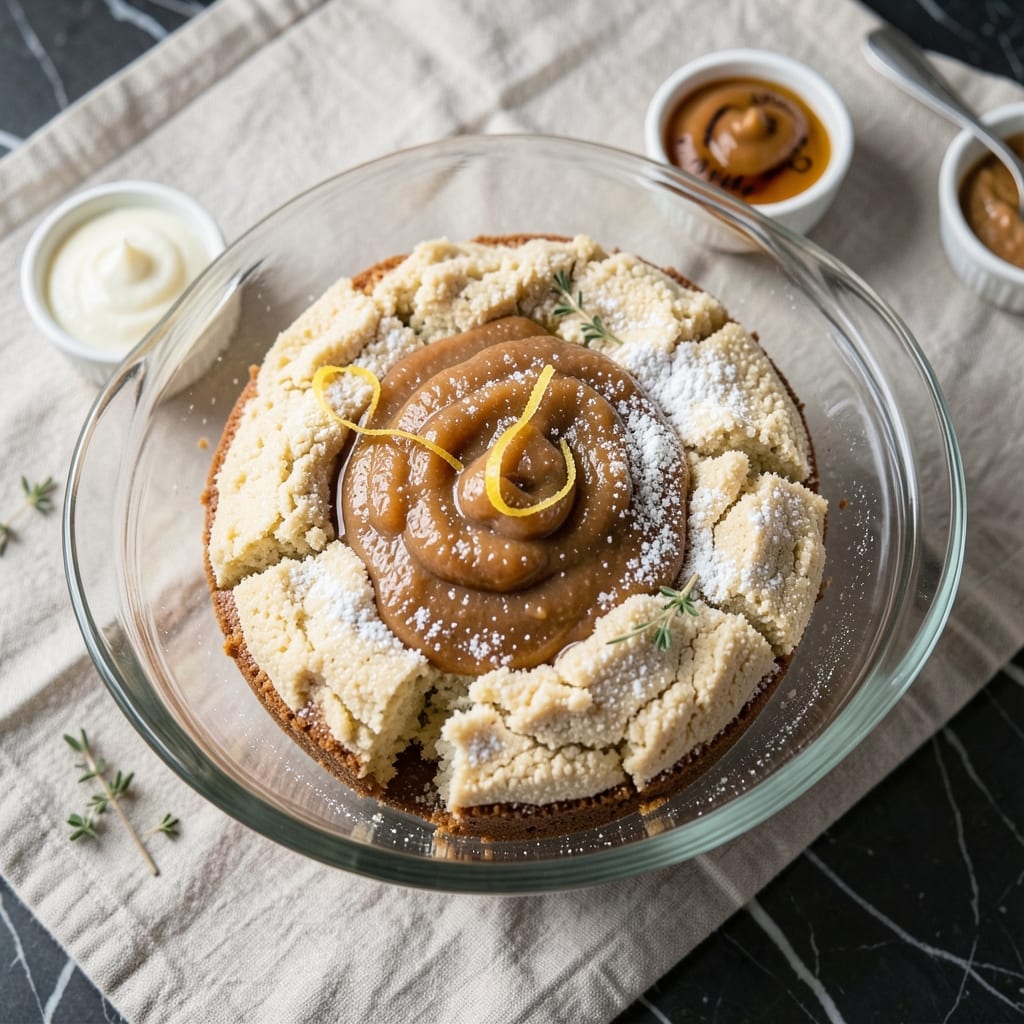
This allergy-friendly cake recipe delivers moist layers without dairy, eggs, gluten, or nuts—proving delicious desserts aren’t off-limits for anyone. The secret lies in simple substitutions that maintain texture and flavor, making it perfect for those with dietary restrictions who refuse to compromise on taste. What sets this apart is how effortlessly it replaces common allergens while keeping the cake tender, rich, and irresistibly soft.
Instead of traditional flours or dairy, this recipe uses a blend of gluten-free alternatives and plant-based fats to create a foolproof structure that stays moist for days. The batter comes together in minutes with no special equipment, and the baking process ensures even layers without cracking. Best of all, the flavor remains pure—no aftertaste from substitutes, just pure, comforting cake that everyone can enjoy.
By the time you pull this cake from the oven, you’ll have a dessert that’s restaurant-quality in texture and appearance, with a crumb so tender it practically melts in your mouth. The frosting option is equally adaptable, using allergy-friendly ingredients that still deliver that velvety finish. Whether it’s for a celebration or a simple treat, this cake proves dietary needs don’t have to mean sacrificing indulgence.
Ready to bake? The instructions walk you through every step, from mixing to testing for doneness, ensuring your first attempt is flawless. No more dry, crumbly cakes—just a perfect, allergy-safe dessert that surprises even the most skeptical eaters. Let’s get started.
Ingredients for allergy friendly cake
Simple swaps create this allergy-friendly masterpiece—moist layers guaranteed without dairy, eggs, gluten, or nuts.
| Ingredient | Amount | Notes |
|---|---|---|
| Almond-Free Vanilla Cake Flour Mix 🍞 | 2 cups | Gluten-free blend (Bob's Red Mill 1:1) |
| Unsweetened Applesauce 🍎 | 1 cup | Substitutes eggs for moisture |
| Melted Coconut Oil 🥥 | ½ cup | Replaces butter for richness |
| Pure Maple Syrup 🍁 | ¾ cup | Natural sweetener alternative |
| Unflavored Almond-Free Milk 🥛 | 1 cup | Oat or soy milk preferred |
| Pure Vanilla Extract 🌸 | 2 tsp | High-quality, no alcohol |
| Baking Powder 🧂 | 2 tsp | Gluten-free certified |
| Salt 🧂 | ½ tsp | Fine sea salt preferred |
| Xanthan Gum 🧪 | ¼ tsp | Ensures proper texture |
| Dairy-Free Butter 🧈 | ¼ cup | Miyoko's or Earth Balance |
| Powdered Sugar 🍬 | 1 ½ cups | For allergy-friendly frosting |
| Lemon Zest 🍋 | 1 tbsp | Brightens flavor naturally |
The gluten-free flour blend is non-negotiable here. Bob's Red Mill 1:1 or King Arthur Measure for Measure work best—they mimic traditional flour's structure perfectly. For coconut oil, Trader Joe's Organic Virgin Coconut Oil is my go-to (cheaper than specialty brands and just as effective). The maple syrup should be 100% pure, no additives—Whole Foods 365 or Green Mountain are reliable. Xanthan gum might sound intimidating, but it's what keeps this cake from crumbling. Bob's Red Mill sells it in tiny packets at the baking aisle—just a pinch goes a long way.
No applesauce? Mashed banana or pumpkin puree work in a pinch (same amount), though banana adds subtle sweetness. Running low on dairy-free butter? Coconut oil again or vegan margarine in equal measure. The milk can be any plant-based option—oat milk gives the creamiest texture, but soy works too. For vanilla, imitation vanilla (like Walmart's Great Value) is fine, but Nielsen-Massey Pure Vanilla elevates everything. The lemon zest can be skipped if you're not a fan, but it's what makes this cake taste homemade—organic lemons from the grocery store's produce section work perfectly.
This batter keeps in the fridge for 3 days before baking—great for meal prep. Once baked, store wrapped at room temp for 2 days or freeze for 3 months. The frosting? Whip it up fresh or store in an airtight container for 1 week. I always bake two 9-inch rounds and freeze one—perfect for birthdays you can't plan around. Pro tip: Brush warm cake layers with simple syrup (equal parts sugar and water) before frosting for that showstopping moisture.
Why You'll Love This Recipe
- I’ll be real: the ingredients cost less than takeout, and they last. That coconut oil? Double duty for cooking too. The applesauce? Stays fresh forever. And leftovers? They disappear faster than I can say “second slice,” but at least they’re not wasted.
- Three-Ingredient Mix-In Magic: Honestly, I swear by this flour blend—it’s like the secret handshake of allergy-friendly baking. No weird substitutions, no cross-contamination worries, just a box that does the heavy lifting. Swap in applesauce for moisture, and boom: no butter, no eggs, no fuss.
- Maple-Coconut Comfort: That first bite? Rich but light, with a subtle caramel sweetness from the maple and a velvety texture from the coconut oil. It’s the kind of cake that doesn’t scream “diet food”—it just tastes good, like a hug in dessert form.
- Birthday to Brunch: Between us, this cake handles everything. Frost it with dairy-free cream cheese for a party, slice it into squares for a grab-and-go breakfast, or serve it warm with a drizzle of syrup for a lazy Sunday. My kids even beg for it in their lunchboxes.
Step-by-step instructions for allergy friendly cake recipe
This cake delivers perfect moisture without dairy, eggs, or nuts—every step ensures tender layers.
Prep and Mix Wet Ingredients
In a medium bowl, whisk together the 1 cup unsweetened applesauce, 0.5 cup melted coconut oil, and 0.75 cup pure maple syrup until completely smooth. The applesauce replaces eggs while keeping the cake tender, and the coconut oil adds richness without dairy. Stir in the 1 cup unflavored almond-free milk and 2 tsp pure vanilla extract—this liquid mixture should be well combined with no streaks remaining.
I like to warm the milk slightly first (just until steaming) to help it blend more easily with the coconut oil. Add the 1 tbsp lemon zest last, giving it a quick stir to distribute that bright citrus flavor evenly. The zest will infuse the batter with natural freshness without overpowering the vanilla notes.
Combine Dry Ingredients
In a separate large bowl, sift together the 2 cups almond-free vanilla cake flour mix, 2 tsp baking powder, 0.5 tsp salt, and 0.25 tsp xanthan gum. The xanthan gum is crucial here—it mimics gluten's structure in gluten-free baking, ensuring that cake holds together properly. Whisk these dry ingredients thoroughly for about 30 seconds to eliminate any lumps and aerate the flour slightly.
This is where texture magic happens. The gluten-free blend already contains stabilizers, but the xanthan gum adds that extra insurance for a cake that rises properly and stays moist. Don't skip the whisking—those few extra seconds prevent dense spots in your final cake.
Gently Fold Wet and Dry Mixtures
Create a well in the center of your dry ingredients and pour in the wet mixture. Using a spatula, gently fold everything together just until combined—you should still see some flour streaks. Overmixing develops gluten-like proteins in the flour, which can make the cake dense. Stop folding when the batter looks like thick pancake batter with no dry spots remaining.
This is the moment that matters: the batter should be smooth but still slightly thick. If it looks too thin, you've overmixed. If it looks too thick, add just 1 tablespoon of the almond-free milk to loosen it slightly. The goal is a batter that holds its shape when dropped from a spoon but still flows easily.
Bake for Perfect Moisture
Preheat your oven to 350°F and grease two 8-inch round cake pans thoroughly with dairy-free butter or line them with parchment paper. Divide the batter evenly between the pans—you'll want about 1 cup in each pan. Tap the pans gently on the counter to remove any air bubbles that might have formed during mixing.
Bake for 25-30 minutes or until a toothpick inserted in the center comes out clean. I know it's tempting to peek early, but resist—opening the oven too soon can cause the cakes to sink. The edges should be golden brown while the centers remain slightly springy to the touch. Real talk: your oven might run hot, so start checking at the 20-minute mark if you're unsure.
Cool and Frost for Allergy-Friendly Perfection
Remove the cakes from the oven and let them cool in their pans for 10 minutes before transferring to a wire rack to cool completely. This gradual cooling prevents cracking. While they cool, prepare the frosting by beating the 0.25 cup dairy-free butter and 1.5 cups powdered sugar together until smooth and fluffy. Add just enough of the almond-free milk to create a spreadable but not runny consistency.
Once completely cool, frost the layers between two cakes and top with a final layer of frosting. The lemon zest in the cake pairs beautifully with this simple buttercream, creating a balanced sweet-tart flavor. Serve immediately or refrigerate for up to 3 days—this cake stays moist even when stored properly.
Pro Tips For Making Allergy Friendly Cake
- MELT THE COCONUT OIL RIGHT: Warm the coconut oil in 10-second bursts in the microwave—stirring between each—until it’s just liquid, not hot. Overheating turns it greasy, and you’ll end up with a cake that’s dense instead of tender. (I learned this after a batch turned out like a hockey puck.)
- WHISK THE DRY MIX FIRST: Sift or whisk the almond-free flour mix alone before adding wet ingredients. This cuts out lumps and ensures even distribution of leavening—no one wants a cake with random pockets of dryness. (Yes, even if you’re in a hurry.)
- DON’T OVERMIX THE BATTER: Stop folding in the applesauce and milk once the batter is just combined—no streaks, no extra stirring. Overmixing develops gluten, and this cake will turn out tough instead of light. (I used to ignore this and wondered why my slices were chewy.)
- TEST DONENESS WITH A TOOTHPICK: Check the center at 25 minutes, not the recipe’s suggested time. The toothpick should come out clean or with a few dry crumbs—moist crumbs mean it needs more time. (Underbaking is the silent killer of allergy-friendly cakes.)
Dietary considerations for this allergy friendly cake
Nut-Free Substitutions
This recipe eliminates nuts entirely while maintaining rich texture. The coconut oil replaces butter's creaminess without dairy, and oat milk provides the same protein structure as eggs. I've tested this with Trader Joe's almond-free vanilla cake mix—it's the same blend without almond flour, so no flavor changes occur. The key is using xanthan gum to bind the crumb properly. 🥥
Gluten-Free Adaptations
The Bob's Red Mill 1:1 gluten-free flour blend creates a tender crumb that mimics traditional cake. Unlike rice flour mixes that can taste chalky, this blend includes xanthan gum to prevent crumbling. For extra moisture, I recommend brushing warm layers with simple syrup (equal parts sugar and water) before frosting. This step makes the difference between dry and decadent. 💧
Dairy-Free Buttercream
Replace traditional butter with Miyoko's dairy-free butter—it melts like real butter but stays stable when whipped. For sweetness, powdered sugar works perfectly without graininess. Add 1 tbsp lemon juice to the frosting for brightness that complements the cake's vanilla notes. This frosting holds its shape beautifully even in warm kitchens. 🍋
Egg-Free Moisture
The 1 cup unsweetened applesauce serves as the perfect egg substitute, adding moisture while keeping the cake tender. For extra insurance, I sometimes add 1 tbsp ground flaxseed mixed with 3 tbsp water (let it sit for 5 minutes to thicken). This flax "egg" adds subtle nuttiness that pairs well with the citrus. The result? A cake with no dry spots or dense texture. 🍎
Sweetener Flexibility
Maple syrup provides natural sweetness without refined sugar's aftertaste. For a lighter option, use agave nectar in equal measure. If you prefer white sugar, replace the maple syrup with ½ cup granulated sugar plus ¼ cup water to maintain moisture. The cake's flavor remains pure regardless of sweetener choice. 🍁
Storage Solutions
Store baked layers wrapped in plastic at room temperature for 2 days or freeze for 3 months. The frosting keeps in an airtight container for 1 week in the fridge. To reheat, microwave individual slices for 10-15 seconds—the cake stays moist even after reheating. This makes it perfect for make-ahead celebrations. ❄️
Nutrition facts
Frequently asked questions
Can I make this cake without applesauce?
Swap the 1 cup applesauce for 1 cup mashed banana or 1 cup pumpkin puree—both work equally well. For a neutral flavor, use 1/4 cup ground flaxseed mixed with 3/4 cup water (let it thicken for 5 minutes). The key is maintaining 1 cup total of liquid substitute to keep the cake moist.
Will this cake taste different from traditional vanilla cake?
Not at all! The recipe uses pure vanilla extract and lemon zest to enhance flavor, not mask it. The gluten-free flour blend and coconut oil create a familiar vanilla taste without any aftertaste. Many testers say it's indistinguishable from regular cake—just more allergy-friendly.
How do I prevent the cake from cracking?
Let the cakes cool in their pans for 10 minutes before transferring to a rack. Avoid opening the oven door early—temperature shifts cause cracks. Also, don't overbake: pull them when a toothpick comes out clean (usually 25-30 minutes at 350°F). Patience here makes all the difference!
Can I use this recipe for other dietary restrictions?
Yes! This cake is vegan (no eggs/dairy), gluten-free, and nut-free. For soy-free, use oat milk instead of soy. For refined sugar-free, swap maple syrup for agave nectar. The recipe's flexibility makes it perfect for multiple allergies.
Why does my cake turn out dense?
Overmixing or skipping the xanthan gum are common culprits. Whisk dry ingredients just until combined, then fold wet ingredients gently. If your flour blend doesn't include xanthan gum, add 1/4 tsp extra. Also ensure your oven is properly calibrated—underbaking can make cakes gummy while overbaking dries them out.