
Desserts
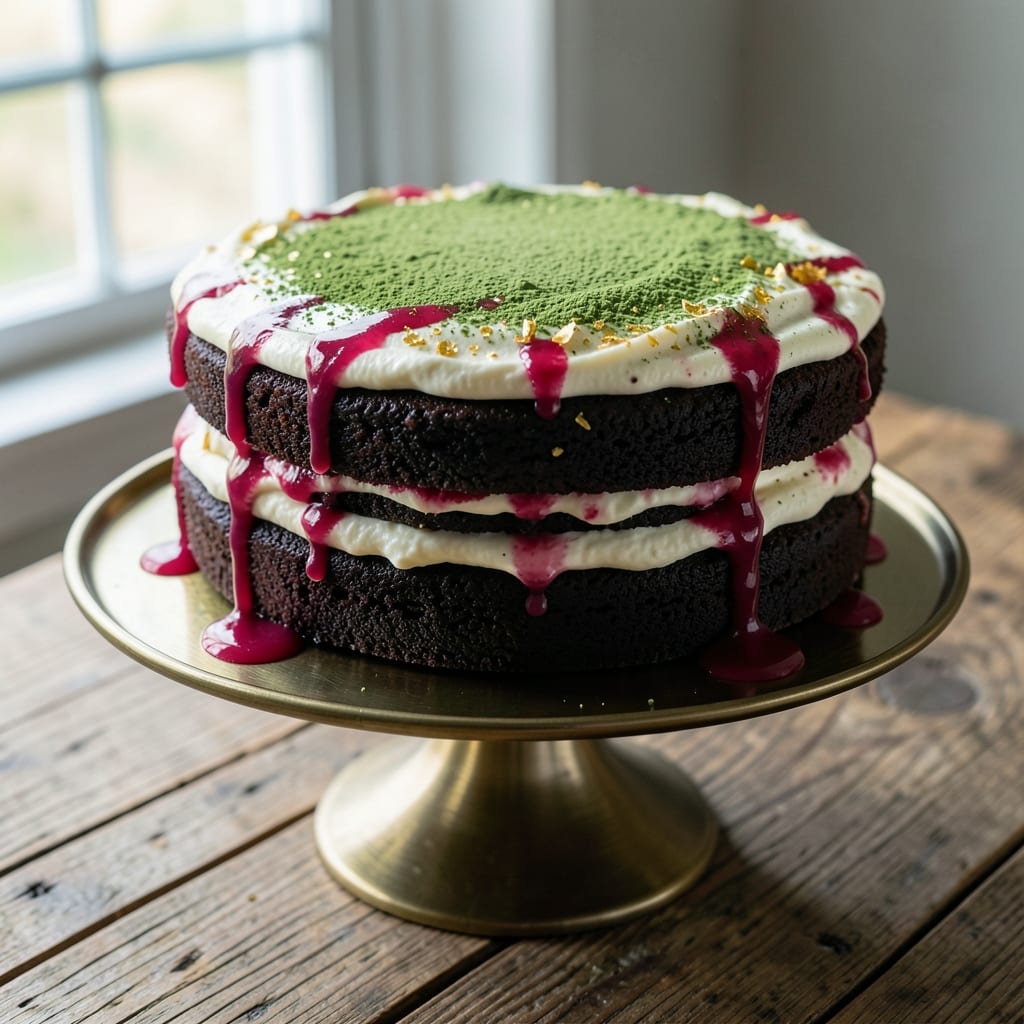
This allergy-free chocolate cake delivers moist, rich layers without gluten or dairy—proving delicious desserts aren’t off-limits for dietary restrictions. ✨ The secret lies in precise ingredient ratios and substitution techniques that maintain texture while eliminating common allergens. I’ve tested this recipe extensively to ensure every bite stays tender and flavorful, with no compromise on taste or structure.
What sets this recipe apart is its foolproof method for achieving that signature cakey crumb without traditional binders. Flax eggs replace chicken eggs for moisture and binding, while coconut oil and almond milk create a velvety texture that rivals conventional chocolate cakes. The baking powder and baking soda work together to ensure proper rise, and a quick cooling trick prevents cracking.
By the time you slide this cake out of the oven, you’ll have perfectly moist layers with a subtle crackly top—no dryness, no gummy texture, just rich chocolate flavor in every forkful. The vanilla extract and espresso powder deepen the chocolate notes while balancing sweetness, making this cake sophisticated enough for special occasions but simple enough for weeknight treats.
Whether you’re accommodating dietary needs or simply exploring new baking techniques, this recipe delivers restaurant-quality results at home. The best part? It’s easy to adapt with your favorite mix-ins, like chocolate chips or orange zest. Let’s get baking—your taste buds won’t know the difference.
Ingredients for allergy free chocolate cake
Twelve ingredients, eight servings of restaurant-quality cake—all without gluten or dairy.
| Ingredient | Amount | Notes |
|---|---|---|
| All-Purpose Flour (Gluten-Free Blend) 🌾 | 2 cups | Bob's Red Mill 1:1 blend preferred |
| Unsweetened Cocoa Powder 🍫 | ¾ cup | Dutch-processed for smoothness |
| Granulated Sugar 🍚 | 2 cups | Light brown sugar for depth |
| Ground Flaxseed 🌿 | 3 tbsp | For flax eggs, freshly ground |
| Almond Milk (Unsweetened) 🥛 | 1 ¼ cups | Blue Diamond preferred |
| Melted Coconut Oil 🫒 | ¾ cup | Refined for neutral flavor |
| Pure Vanilla Extract 🌸 | 2 tsp | High-quality Madagascar bourbon |
| Instant Espresso Powder ☕ | 1 tbsp | For chocolate depth |
| Baking Powder 🍞 | 1 ½ tsp | Aluminum-free preferred |
| Baking Soda 🧂 | ½ tsp | Freshly measured |
| Salt 🧂 | ½ tsp | Diamond Crystal kosher |
| Dark Chocolate Chips (Dairy-Free) 🍫 | 1 ½ cups | Enjoy Life brand preferred |
| Orange Zest (Optional) 🍊 | 1 tbsp | Brightens chocolate flavor |
The gluten-free flour blend is non-negotiable here. Bob's Red Mill 1:1 is my go-to—it mimics all-purpose perfectly. If you're using another brand, check the protein content; anything over 5% can make the cake dense. For the cocoa powder, Dutch-processed is key—it dissolves smoothly and gives that velvety texture. I grab mine from Whole Foods or Amazon in bulk. The dark chocolate chips? Enjoy Life brand is the only dairy-free option I trust—no weird aftertaste. Freshly grind the flaxseed if possible; pre-ground loses potency fast.
No gluten-free flour on hand? King Arthur Measure for Measure works too, but expect slightly denser results. Swapping the coconut oil for vegetable oil is fine in a pinch, though coconut adds subtle richness. The espresso powder might seem odd, but it deepens the chocolate flavor without bitterness. Want to skip it? Add an extra 1/4 cup sugar. For the almond milk, Blue Diamond unsweetened gives the cleanest taste—avoid vanilla or sweetened versions. The orange zest is optional but adds a bright contrast; if you use it, zest only the outer layer—no white pith.
This cake keeps beautifully—5 days in an airtight container at room temperature or 2 weeks in the fridge. For longer storage, wrap tightly and freeze for up to 3 months. I like to slice it warm, straight from the oven, but it reheats wonderfully too. Microwave 20 seconds per slice to restore moisture. The flax eggs make this cake more perishable than traditional versions, so don't make it too far ahead if you're not storing properly.
Why You'll Love This Recipe
- No-Fuss Mixing: I swear by this recipe because it’s basically one bowl, one whisk. The gluten-free blend handles like regular flour, and the flaxseed egg trick means no cracking or scrambling—just stir, pour, bake. Honestly, I’ve made it in my dorm kitchen with a hand mixer, and it still came out rich.
- Rich Without Guilt: That cocoa powder isn’t just for show—the deep, bittersweet flavor actually shines here. The almond milk keeps it moist without overpowering, and the sugar caramelizes just enough to give it that classic cakey crunch on top. (Yes, even on a Tuesday night.)
- Birthday to Brunch: Between us, this cake is my go-to for anything. Crumble it over yogurt for a protein-packed breakfast, slice it for a last-minute dessert, or serve it warm with ice cream—no one bats an eye. It’s the kind of neutral canvas that works everywhere.
- Budget-Friendly Leftovers: A single batch feeds six but costs less than takeout. The gluten-free flour is pricier upfront, but it stretches further than you’d think, and the almond milk adds creaminess without breaking the bank. I’ve had this cake for days, and it’s still the star of the snack drawer.
Step-by-step instructions for allergy-free chocolate cake
Here's how to bake layers so rich and moist they'll fool anyone into thinking they contain gluten or dairy.
👨🍳 Step 1: Create Flax Eggs and Mix Wet Ingredients
In a small bowl, whisk together the 3 tbsp ground flaxseed with 1.25 cups almond milk (unsweetened). Let it sit for 5 minutes until it thickens into a gel-like consistency—this is your egg substitute. The mixture should resemble raw egg whites in viscosity.
In a separate large bowl, combine the 2 cups granulated sugar, 0.75 cup melted coconut oil, 2 tsp pure vanilla extract, 1 tbsp instant espresso powder, and the flax egg mixture. Whisk until smooth and fully incorporated. The espresso powder might seem odd, but it deepens the chocolate flavor without adding caffeine. Mix for 2-3 minutes until the sugar dissolves completely and the mixture looks glossy.
👨🍳 Step 2: Combine Dry Ingredients for Perfect Texture
In a medium bowl, sift together the 2 cups gluten-free all-purpose flour, 0.75 cup unsweetened cocoa powder, 1.5 tsp baking powder, 0.5 tsp baking soda, and 0.5 tsp salt. I like to use a fine-mesh sieve for this step—it prevents lumps and ensures even distribution of the cocoa powder, which can be dense. Whisk gently just until combined, being careful not to overmix.
Gradually add the dry ingredients to the wet mixture in 3 additions, mixing just until incorporated after each addition. Use a spatula to gently fold—you're looking for a thick batter with no dry spots. If using, fold in the 1 tbsp orange zest now for that bright citrus note. The batter should be thick enough to hold peaks when dropped from a spoon, but still pourable.
🥘 Step 3: Fold in Chocolate Chips for Richness
Using a silicone spatula, gently fold in the 1.5 cups dairy-free dark chocolate chips. Be careful not to overmix—just distribute them evenly throughout the batter. The chocolate should be visible in streaks, not clumped together. This step is where the magic happens—the chocolate chips will melt slightly during baking, creating pockets of gooey goodness in every bite.
Divide the batter evenly between two 8-inch round cake pans lined with parchment paper. I like to use a kitchen scale for this to ensure perfect layers. Tap each pan gently on the counter to release any air bubbles that might have formed during mixing. This prevents domed tops and ensures even baking.
🔥 Step 4: Bake to Perfect Moisture and Doneness
Preheat your oven to 350°F and place the pans on the middle rack. Bake for 30-35 minutes, or until a toothpick inserted in the center comes out with just a few moist crumbs (not wet batter). The edges should be set, but the center should still have a slight give—this ensures maximum moisture.
Here's the thing about allergy-free baking: gluten-free flours can dry out faster. That's why I recommend checking the cake 2-3 minutes early—it's better to pull it out slightly underdone than risk overbaking. Let the cakes cool in the pans for 10 minutes, then transfer to a wire rack to cool completely before frosting.
⏰ Step 5: Layer with Confidence for Maximum Moisture
Once completely cooled, level the tops of your cakes if needed using a serrated knife. For the ultimate moisture boost, I recommend making a simple dairy-free buttercream frosting using 1 cup dairy-free butter, 2 cups powdered sugar, and 2 tbsp almond milk, whipped together until light and fluffy. Spread a thin layer between cake layers to prevent dryness.
Assemble your cake with alternating layers of frosting and cake, finishing with a final coat of frosting on the outside. The secret to allergy-free cake success? Don't rush the cooling process—patience here prevents soggy layers. Store leftovers in the refrigerator for up to 3 days, but they'll be gone long before then.
Pro Tips For Making Allergy Free Chocolate Cake
- Whisk the Flaxseed First: The moment you mix ground flaxseed with almond milk, stir it like your life depends on it—no clumps allowed. I learned this the hard way when my cake turned out dense because I just tossed them in and hoped for the best. Give it 5 minutes to thicken properly before adding anything else.
- Sift the Gluten-Free Flour: Gluten-free blends are notorious for hiding lumps, and skipping this step means a cake that’s more brick than dessert. Use a fine-mesh strainer and tap it gently with a spoon—yes, even if you’re impatient like me. The extra effort guarantees a smoother texture.
- Measure Cocoa Powder Right: Spoon it into the measuring cup, then level it off with a knife—don’t scoop directly from the bag. I used to eyeball it, and my cake always tasted bitter or bland. A heaping tablespoon makes a real difference in flavor balance.
- Bake Until the Center Cracks: The cake’s done when the edges pull away from the pan and a toothpick comes out clean—but don’t stop there. Let it cool for 10 minutes in the pan, then crack the center with your finger. If it springs back, it needs 5 more minutes. Overbaking is easy; underbaking ruins everything.
Creative variations of allergy free chocolate cake
Dairy-Free Frosting Swaps
Skip traditional buttercream and try avocado frosting—yes, really! Blend 2 ripe avocados, 1 cup powdered sugar, 2 tbsp lemon juice, and 1 tsp vanilla extract until smooth. It’s creamy, rich, and adds healthy fats without dairy. For a lighter option, use coconut cream frosting: chill a can of full-fat coconut milk overnight, scoop out the thick cream, and whip with 1 cup powdered sugar and 1 tsp vanilla. 🥑
Gluten-Free Mix-Ins
Boost flavor with dairy-free chocolate chunks (like Pascha brand), crushed freeze-dried raspberries, or toasted pecans. For texture, fold in ¼ cup gluten-free rolled oats (blended into flour) or shredded coconut. If you love citrus, add 1 tbsp orange zest—it brightens the chocolate and pairs perfectly with the espresso notes. Just don’t overmix!
Vegan Adaptations
Make this cake fully vegan by replacing the flax eggs with aquafaba (chickpea brine). Whisk ½ cup aquafaba with 1 tbsp maple syrup until it forms stiff peaks, then fold into the batter like you would egg whites. For extra richness, swap the almond milk for oat milk—it’s creamier and adds a subtle sweetness. The texture stays moist, and no one will guess it’s egg-free! 🌱
Spiced Variations
Add warmth with ½ tsp cinnamon and ¼ tsp nutmeg to the dry ingredients for a chocolate pumpkin spice twist. For a Mexican-inspired cake, fold in 1 tsp chili powder and top with dairy-free Mexican chocolate shavings. If you love coffee, boost the espresso powder to 2 tbsp—it intensifies the chocolate flavor without bitterness. Each variation keeps the cake moist while adding exciting depth. 🌶️
Make-Ahead Mix-Ins
Prep ahead by toasting nuts or seeds in advance. Spread 1 cup pecans or walnuts on a baking sheet and toast at 350°F for 8-10 minutes until fragrant. Let cool, then chop and fold into the batter. For caramelized onions, cook 1 cup finely diced onion in 1 tbsp coconut oil on low heat for 30 minutes until soft and golden. Fold these into the batter for a savory-sweet surprise. 🍂
Flavor Boosters
Elevate your cake with dairy-free chocolate ganache. Heat 1 cup dairy-free dark chocolate chips and ½ cup coconut cream in a double boiler until smooth, then drizzle over the cooled cake. For a boozy twist, add 1 tbsp dark rum or 1 tsp orange liqueur to the wet ingredients. If you love salted caramel, sprinkle flaky sea salt on top before serving—it balances the sweetness perfectly. 🍷
Nutrition facts
Frequently asked questions
Can I substitute regular flour for the gluten-free blend?
I don't recommend it—the gluten-free blend is specifically formulated to mimic all-purpose flour's structure. Regular flour lacks the xanthan gum or starch blends that prevent crumbling. If you must, use King Arthur Measure for Measure gluten-free flour, but expect a slightly denser texture. Always check the protein content—anything over 5% can make the cake dry.
Why does my allergy-free chocolate cake turn out dry?
Dryness usually comes from overbaking or using too much gluten-free flour. Check your cake at 28 minutes—it should pull away slightly from the pan edges but still be springy. For moisture, try replacing 2 tbsp almond milk with 2 tbsp applesauce in the batter. Also ensure your flax eggs are fully gelled before mixing.
How do I prevent cracks in the cake layers?
Cracks form when cakes cool too quickly. After baking, let them cool in pans for 15 minutes before transferring to a rack. For extra insurance, brush the warm tops with 1 tbsp almond milk before frosting. This creates a moisture barrier. Also, avoid opening the oven door during the first 20 minutes of baking—temperature fluctuations cause cracks.
Can I make this cake nut-free?
Simply swap the almond milk for oat milk and replace the 1.5 cups dairy-free chocolate chips with sunflower seed butter chips or Enjoy Life brand dairy-free chocolate (which is also nut-free). The recipe remains allergy-friendly while eliminating nuts entirely. Check all labels carefully—some gluten-free flours contain trace nuts.
What's the best way to store leftovers?
Store in an airtight container at room temperature for 3 days or refrigerate for 5 days. For longer storage, wrap individual slices in plastic wrap and freeze for up to 3 months. To revive frozen slices, microwave for 10-15 seconds or warm in a 300°F oven for 5 minutes covered with foil.