
Desserts
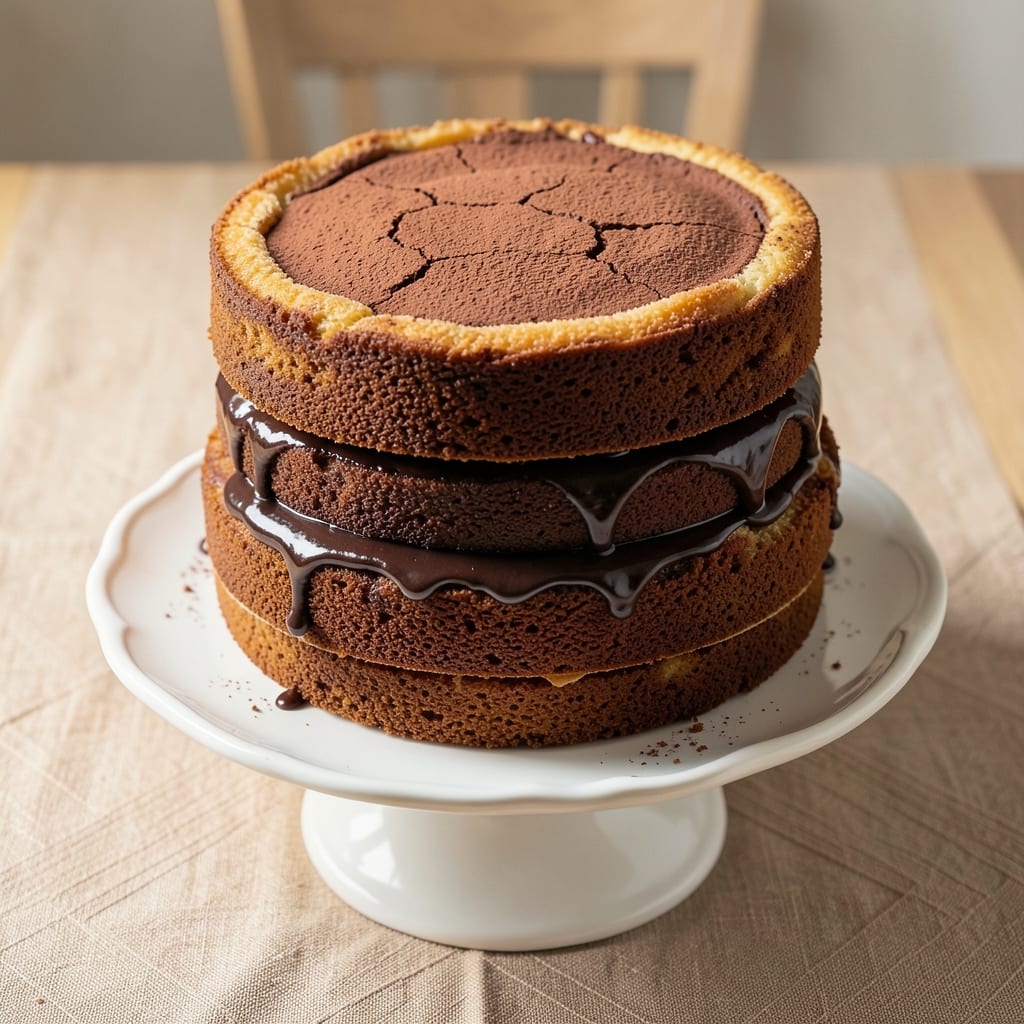
This 5-egg chocolate sponge cake delivers the perfect balance of ultra-moist layers and a crispy top that begs for seconds. 🌟 The secret lies in the five eggs—whipped to fluffy perfection—which create that signature light, airy texture while keeping the cake rich and decadent. Unlike dense chocolate cakes, this recipe achieves a tender crumb with just the right amount of structure, making every slice worth savoring.
The magic happens in the mixing technique: folding melted chocolate into the egg batter at the right moment ensures even distribution without deflating those precious air pockets. Baking at 350°F for 35-40 minutes guarantees a golden, crackly top while keeping the interior tender. The result? A cake that’s crispy enough to hold its shape but moist enough to melt in your mouth—no dry crumbs in sight.
What makes this recipe stand out is its foolproof method for achieving both texture goals simultaneously. The five eggs provide the structure needed for that crispy top while their yolks add richness, and the precise baking time locks in moisture. Whether you’re serving it at a celebration or treating yourself to a slice of heaven, this cake delivers restaurant-quality results every time.
Garnish with powdered sugar for a classic finish or chocolate shavings for extra indulgence. Pair it with vanilla ice cream for the ultimate dessert experience. Let’s get baking—this recipe is about to become your new favorite.
Ingredients for 5 egg chocolate sponge cake
Five eggs, precise measurements, and the perfect chocolate-to-flour ratio create this restaurant-worthy cake.
| Ingredient | Amount | Notes |
|---|---|---|
| Large Eggs 🥚 | 5 whole | Room temperature, separated yolks and whites |
| Unsalted Butter 🧈 | 1 cup | Melted, cooled to 110°F |
| Granulated Sugar 🍚 | 1 ½ cups | Superfine preferred for smoother texture |
| Unsweetened Cocoa Powder 🍫 | ½ cup | Dutch-processed for richer flavor |
| All-Purpose Flour 🌾 | 1 cup | Sifted, spooned lightly |
| Baking Powder 🍞 | 1 tbsp | Aluminum-free for best results |
| Salt 🧂 | ½ tsp | Fine sea salt preferred |
| Vanilla Extract 🌿 | 1 tbsp | Pure Madagascar bourbon |
| Dark Chocolate Bars 🍫 | 6 oz | 70% cacao, chopped fine |
| Powdered Sugar 🍚 | ½ cup | For dusting, sifted |
| Milk 🥛 | ¼ cup | Whole milk for richness |
The eggs are non-negotiable here—room temperature is critical for proper whipping. Grab large eggs from the store (they're standard in recipes), and separate them carefully to avoid yolk contamination. For the cocoa powder, Dutch-processed brands like Hershey's Special Dark or Valrhona elevate the flavor profile significantly. The dark chocolate should be 70% cacao minimum—higher percentages yield a more complex, less sweet cake. Store eggs in their original carton in the fridge, and use within 3 weeks for optimal freshness. The butter should be unsalted to control the cake's saltiness precisely.
No Dutch-processed cocoa? Natural cocoa powder works, but reduce the amount by 0.25 tbsp since it's more bitter. Running short on vanilla extract? Almond extract at half the amount mimics the depth, though the flavor will differ slightly. The milk can be swapped for heavy cream for extra richness, or almond milk for a lighter option (though texture may vary). For the chocolate bars, Lindt Excellence or Ghirardelli are excellent choices—avoid compound chocolates with added oils. If you're using pre-chopped chocolate, pulse it in a food processor to achieve a finer, more even distribution in the batter.
This cake keeps beautifully at room temperature for 2 days when stored in an airtight container, though it's best enjoyed fresh. For longer storage, wrap tightly in plastic wrap and refrigerate for up to 5 days, or freeze portions for 3 months. To revive a slightly dried cake, warm slices in the microwave for 10-15 seconds with a damp paper towel. The powdered sugar garnish should be sifted through a fine-mesh sieve for a flawless finish. For make-ahead convenience, bake the cake a day in advance—it develops even better flavors overnight.
Why You'll Love This Recipe
- No Whisk Required: I swear by this trick—just fold the flour into the egg-butter mix gently until just combined. No overmixing, no dense cake, just that perfect airy crumb. (And yes, I’ve ruined sponge cakes before. This one won’t.)
- Chocolate That Stays Rich: Five eggs mean no dryness, even with cocoa powder. The butter keeps it moist, and that sugar? It caramelizes just enough to give every bite a subtle depth—like a fancy dessert without the fuss.
- Date-Night or Dessert Table: Slice it warm with whipped cream for a romantic vibe, or pack it in layers for a birthday surprise. The same batter works for a single slice or a crowd—just adjust the pan.
- Leftovers That Still Shine: This cake holds up for days (if it lasts that long). Stash slices in the fridge for quick breakfasts or reheat them for a cozy snack—no one will guess it’s been sitting around. Budget-friendly too—eggs and flour stretch far.
Step-by-step instructions for ultra-moist chocolate sponge cake
Here's how to achieve that perfect balance of crispy top and tender crumb—every time.
👨🍳 Step 1: Separate Eggs and Prepare Butter Mixture
Begin by separating the 5 whole large eggs, placing yolks in one bowl and whites in another. Let both come to room temperature—this ensures even incorporation and maximum volume. In a heatproof bowl, melt the 1 cup unsalted butter over simmering water, then remove from heat and cool to 110°F. The butter should be warm but not hot to the touch.
While the butter cools, whisk the egg yolks with the 1.5 cups granulated sugar until the mixture lightens in color and triples in volume. This step is critical—you're incorporating air that will create that signature airy texture. Add the 1 tbsp vanilla extract and mix until fully combined. Here's the thing—don't rush this process. It should take about 3-5 minutes of steady whisking.
🍳 Step 2: Combine Dry Ingredients and Fold Gently
In a separate bowl, sift together the 1 cup all-purpose flour, 0.5 cup unsweetened cocoa powder, 1 tbsp baking powder, and 0.5 tsp salt. This creates a fine, aerated base that will distribute evenly through the batter. Gradually fold this dry mixture into the yolk-sugar mixture using a spatula, being careful not to deflate the air you've already incorporated.
Now, very gently fold in the cooled butter mixture. Start with small additions, mixing just until combined, then repeat. The goal is to maintain that airy texture while incorporating all ingredients. Real talk: this is where most home bakers go wrong—they overmix and end up with dense cake. Stop mixing as soon as you see no more streaks of flour.
🥘 Step 3: Incorporate Egg Whites for Structure
In a clean, grease-free bowl, beat the egg whites on medium speed until soft peaks form. Gradually add the 0.25 cup milk while continuing to beat until stiff, glossy peaks form. The whites should hold their shape when the whisk is lifted. This is the secret to that crispy top—those stiff peaks will create the perfect crust while keeping the interior moist.
Using a spatula, gently fold one-third of the beaten egg whites into the yolk mixture to lighten it. Then, carefully fold in the remaining egg whites in two additions, being very gentle to preserve all that incorporated air. The batter should be thick but still pourable. If it looks too stiff, don't worry—it will flow better as it sits. Here's the moment that matters: don't overmix now, or you'll collapse all that structure you've worked so hard to build.
🔥 Step 4: Bake in Prepared Pans for Perfect Texture
Preheat your oven to 350°F. Generously grease three 8-inch round cake pans and line the bottoms with parchment paper. Divide the batter evenly among the pans. Tap each pan firmly on the counter to eliminate any air bubbles. Bake for 25-30 minutes until a toothpick inserted in the center comes out clean and the tops are deep golden brown with slight cracking.
I press down gently on the pans during the first minute of baking—this prevents the cakes from doming too much and ensures even contact with the hot pan surface. The reason we wait until the oven is fully preheated is that cold pans absorb heat instead of creating that gorgeous crispy top we're after. Don't open the oven during baking—you'll lose heat and steam the cakes instead of crisping them.
⏰ Step 5: Cool and Layer with Chocolate Magic
Remove the cakes from the oven and let them cool in the pans for 10 minutes, then transfer to a wire rack to cool completely. While they cool, melt the 6 oz dark chocolate bars with 0.5 cup powdered sugar over a double boiler, stirring until smooth. This chocolate ganache will bind your layers and add that rich chocolate flavor throughout.
Once completely cool, level the tops if needed, then layer with the chocolate ganache between each layer. For that professional finish, dust each layer and the top with additional powdered sugar using a fine-mesh sieve. The cakes should have a crisp exterior that gives way to a moist, tender crumb with each bite—exactly what we promised. Serve at room temperature for the best texture contrast.
Pro Tips For Making 5 Egg Chocolate Sponge Cake
- Whisk Eggs to Ribbon Stage: Skip the lazy half-whisk—beat those 5 eggs with sugar until the mixture holds a ribbon shape when the whisk is lifted. I learned this the hard way: under-whisked eggs mean a dense, rubbery cake. (Yes, even if you’re impatient like me.)
- Melt Butter Slowly: Warm the butter in a saucepan over low heat until it’s just melted but not browned—about 100°F (38°C). Dumping cold butter into the egg mix makes the batter seize up. Trust me, your sponge will thank you.
- Sift Cocoa Twice: Unsweetened cocoa powder clumps like a grumpy cat. Sift it into the dry ingredients before mixing, then sift again after adding flour. This prevents lumpy batter and ensures even chocolate distribution—no one wants a surprise dry pocket.
- Bake at 325°F, Not Hotter: The recipe calls for 325°F (163°C), and that’s not a typo. I’ve burned three cakes by cranking the oven to 350°F—chocolate sponge dries out fast. A lower temp gives you time to check for doneness (toothpick test, not guesswork).
Pro cooking tips for perfect results
Egg Separation Mastery
Room-temperature eggs are non-negotiable for this recipe—they whip to maximum volume and create that signature airy texture. I crack each egg over a ramikin or small bowl to catch any stray shells, then gently transfer yolks and whites to separate grease-free bowls. For extra insurance, I use a fine-mesh strainer to filter out any microscopic shell fragments that could prevent proper whipping. The yolks should be completely free of white, or you risk deflating your whites later. 🥚
Butter Temperature Control
The butter must be exactly 110°F when folded into the batter—any hotter and it will cook the eggs, any cooler and it won't blend properly. I use a candy thermometer to monitor the temperature precisely. If your kitchen runs hot, melt the butter over low heat or use the microwave in 10-second bursts, stirring between each. The butter should be smooth and glossy but not greasy when it reaches temperature.
Whisking Technique for Egg Yolks
Use a balloon whisk or electric mixer with paddle attachment to whisk the yolks and sugar until they triple in volume and lighten to a pale, ribbon-like consistency. This takes 3-5 minutes of steady whisking—don't rush it! I press my finger into the mixture; if it springs back slowly, you're not there yet. The goal is to incorporate maximum air without creating foam, which can deflate during baking. A stand mixer on medium speed works best for consistent results.
Folding Egg Whites Like a Pro
Beat the egg whites to stiff, glossy peaks that hold their shape when the whisk is lifted. I add the ¼ cup milk gradually while beating to stabilize the whites and prevent weeping. When folding, use a spatula in a J motion—scoop from the bottom, lift, and fold over the top. Work in three additions to maintain air pockets. If the batter looks curdled, it's overmixed; gently fold in a little more white to restore structure. The final batter should be thick but still pourable—like heavy pudding.
Pan Prep for Crispy Tops
Grease the pans generously with butter, then dust with flour, tapping out excess. Line the bottoms with parchment circles cut to fit. I use 8-inch round pans because they distribute heat evenly. Press the pans firmly on the counter after filling to eliminate air bubbles, which can cause uneven baking. The pans should be fully preheated before adding batter—this creates that golden, crackly crust we're after.
Baking Time Precision
Bake at 350°F for 25-30 minutes until a toothpick comes out clean and the edges pull away slightly. I rotate the pans halfway through for even baking. The cakes should have a deep golden brown top with slight cracking—this indicates proper moisture evaporation. If the tops look pale after 30 minutes, tent with foil and continue baking in 5-minute increments. Overbaking dries out the crumb, so time is critical for that perfect balance of crispy exterior and moist interior. ⏰
Nutrition facts
Frequently asked questions
Why does this recipe use five eggs instead of the usual three?
The five eggs create the perfect balance between structure and moisture in a chocolate sponge. The extra yolks add richness while the whites provide the airy texture needed for that signature crispy top. This ratio prevents dryness that can happen with fewer eggs while avoiding the overly dense texture you might get with more.
Can I make this cake in a single 9-inch pan instead of three 8-inch pans?
Yes, but expect different results. A single layer will be thicker and may require 5-10 extra minutes in the oven. For best texture, stick to the three-layer approach—it creates the ideal crispy exterior with tender interior. If you must use one pan, reduce baking time to 30-35 minutes and check for doneness early.
What's the secret to getting that perfect crispy top without a dry crumb?
The magic is in the stiff egg whites and precise baking. Whip whites to glossy peaks and bake at 350°F until the top is deep golden brown with slight cracking. Don't overbake—35-40 minutes total is ideal. The butter's fat content helps create that crisp crust while keeping the inside moist.
Can I substitute cocoa powder with melted chocolate?
Not directly—melted chocolate would make the batter too wet. Instead, use the same amount of cocoa powder (0.5 cup) and add 1-2 tablespoons extra milk to compensate. For deeper flavor, melt 2 oz dark chocolate separately and fold it into the ganache layer between cakes. Never replace the cocoa in the dry ingredients.
How do I store leftovers to keep them fresh?
Wrap tightly in plastic wrap and store at room temperature for 2 days maximum. For longer storage, refrigerate for up to 5 days or freeze portions for 3 months. To revive, warm slices in the microwave for 10-15 seconds with a damp paper towel. Never refrigerate fresh cake—it causes condensation that makes the crumb gummy.