
Desserts
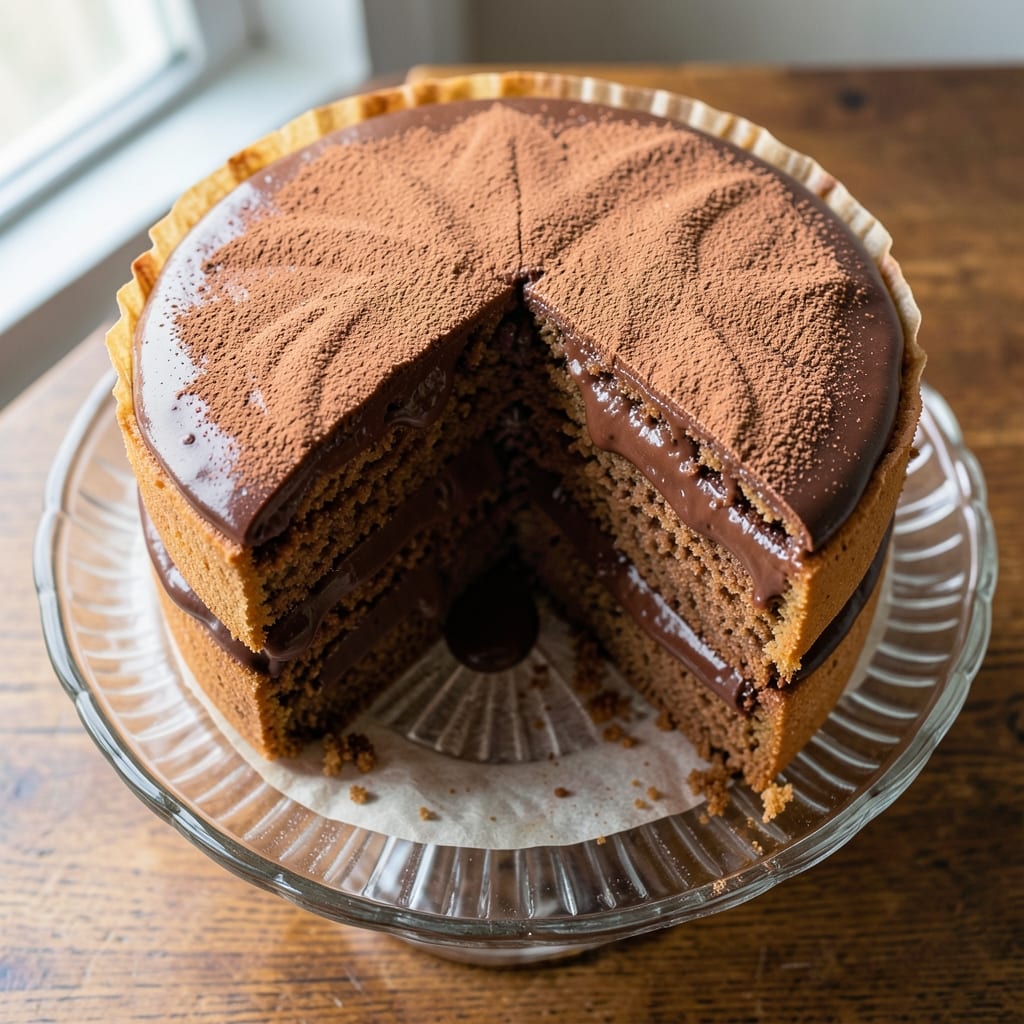
This 1950s chocolate cake recipe brings back the nostalgia of homemade desserts that were rich, moist, and perfectly balanced—just like your grandmother used to make. The secret lies in a simple yet effective combination of cocoa powder, melted chocolate, and buttermilk, creating layers of deep, velvety flavor that stand the test of time. Unlike modern recipes that rely on shortcuts, this version delivers that classic, old-school texture that makes every slice worth savoring.
The beauty of this recipe is in its simplicity and reliability. With just a few basic ingredients and a foolproof method, you’ll achieve a moist crumb that stays tender for days, paired with a homestyle frosting that’s creamy yet not overly sweet. The vintage techniques—like baking in a round pan and layering carefully—ensure the cake rises evenly and holds its shape, just as it would have in a 1950s kitchen. It’s the kind of dessert that feels like a warm hug, perfect for family gatherings or a cozy night in.
What makes this cake truly special is how it transports you back to an era when baking was an art form, not a rushed task. The frosting, made with butter and powdered sugar, has a smooth, almost buttery finish that melts into the cake with every bite. The result? A slice that’s rich, indulgent, and impossibly satisfying—without being too heavy or overly sweet. It’s the kind of dessert that becomes a tradition, passed down through generations.
Whether you’re recreating a piece of history or simply craving a classic treat, this recipe delivers. The instructions are straightforward, the ingredients are easy to find, and the outcome is always impressive. Ready to bring a taste of the 1950s into your kitchen? Let’s get started.
Ingredients for 1950 chocolate cake
Classic ingredients for a timeless cake that stays moist for days, just like grandma used to make.
| Ingredient | Amount | Notes |
|---|---|---|
| All-Purpose Flour 🌾 | 2 cups | Sifted for even texture |
| Unsalted Butter 🧈 | 1 cup | Room temperature, full-fat preferred |
| Granulated Sugar 🍚 | 2 cups | White or light brown |
| Cocoa Powder 🍫 | ¾ cup | Natural, unsweetened preferred |
| Buttermilk 🥛 | 1 cup | Fresh, not powdered |
| Large Eggs 🥚 | 2 whole | Room temperature |
| Baking Soda 🧂 | ½ tsp | Pure, not baking powder |
| Vanilla Extract 🌿 | 1 tsp | Pure, not imitation |
| Salt 🧂 | ½ tsp | Fine sea salt |
| Semisweet Chocolate Chips 🍫 | 1 ½ cups | High-quality, 60% cocoa |
| Powdered Sugar 🍚 | 3 cups | Sifted for smooth frosting |
| Heavy Cream 🥛 | ½ cup | Cold for whipping |
| Vanilla Bean Paste 🌿 | 1 tsp | Or 0.5 tsp pure vanilla extract |
The cocoa powder is non-negotiable here—Hershey’s Special Dark or Dutch-processed from the baking aisle gives that deep, velvety flavor. For buttermilk, Kroger or store-brand works fine, but if you’re in a pinch, mix 1 cup milk with 1 tbsp vinegar and let it sit for 5 minutes. The chocolate chips? Ghirardelli or Guittard are worth the splurge—they melt smoothly and add pockets of gooey goodness. Butter matters too—Land O’Lakes or Plugrá are reliable, but if you’ve got European-style butter, use it. The higher fat content makes the cake richer.
No buttermilk? Plain yogurt thinned with milk works in a bind. Short on cocoa powder? Melted chocolate substituted at half the amount (so 0.375 cup melted chocolate instead of 0.75 cup cocoa). The frosting can be made ahead—just whip the cream last minute to keep it light. For a vintage touch, dust the cake with powdered sugar before frosting, just like old home movies show. And if you’re feeling fancy, add a pinch of espresso powder to the cocoa mix—it deepens the chocolate flavor without adding bitterness.
Store the cake in an airtight container at room temperature for up to 3 days, or freeze for 2 months. The frosting keeps separately for 1 week in the fridge—just whip it back up before serving. For serving, slice with a hot knife (dip in hot water, wipe dry) for clean cuts. Leftovers? Wrap tightly and refrigerate—the frosting might weep a little, but a quick re-whip fixes that. This cake actually tastes better the next day as the flavors meld.
Why You'll Love This Recipe
- Foolproof Mixing: I swear by this recipe—just creaming butter and sugar until light, then folding in dry ingredients without overmixing. The buttermilk keeps it tender, and the cocoa powder delivers that deep, velvety richness without bitterness. No fancy techniques, just reliable results every time.
- Decadent Without Guilt: That perfect balance of sugar and cocoa? It’s like a hug for your taste buds. The buttermilk adds a subtle tang that cuts through the sweetness, and the butter—oh, the butter—makes it moist enough to melt in your mouth. Honestly, it’s the kind of cake that makes you forget about "healthy" for a second.
- Party or Puddle: This cake is my go-to for birthdays, potlucks, or even a lazy Sunday. Serve it plain with a dusting of powdered sugar, or go wild with whipped cream and chocolate shavings. Between us, it’s also the star of my "emergency dessert" drawer when I’ve got nothing else.
- Budget Magic: Five ingredients, one bowl, zero fuss. The butter and sugar are the stars, but the cocoa powder and buttermilk stretch every dollar. Plus, it keeps for days in the fridge—so you can bake once and enjoy slices all week. My wallet and my sweet tooth thank me every time.
Step-by-step instructions for 1950s chocolate cake
This classic recipe delivers a perfectly moist crumb and velvety frosting—just like grandma used to make.
Prepare the Cake Batter
Preheat your oven to 350°F and grease two 9-inch round cake pans with butter, then line the bottoms with parchment paper. In a medium bowl, whisk together the 2 cups all-purpose flour, 0.5 tsp baking soda, and 0.5 tsp salt. Sift the mixture to remove any lumps—this ensures a light, even texture in your cake.
In a separate large bowl, cream together the 1 cup unsalted butter and 2 cups granulated sugar using an electric mixer on medium speed for 3-4 minutes until light and fluffy. The mixture should nearly double in volume and turn pale. This creaming process incorporates air, which creates that signature tender crumb. Scrape down the sides of the bowl as needed to keep the mixture smooth.
Add Wet Ingredients and Fold in Chocolate
Add the 2 whole large eggs, one at a time, mixing well after each addition. Then stir in the 1 tsp vanilla extract and 1 tsp vanilla bean paste until fully combined. The batter should be thick and smooth. Gradually add the 1 cup buttermilk while mixing on low speed, just until incorporated.
In a small bowl, whisk together the 0.75 cup cocoa powder and 1.5 cups semisweet chocolate chips. Gently fold this mixture into the wet ingredients using a spatula, being careful not to overmix. The batter will be thick and fudgy—this is exactly what you want for that classic 1950s texture. Divide the batter evenly between the prepared cake pans.
Bake Until Springy and Cool Completely
Bake the cakes in the preheated oven for 30-35 minutes, or until a toothpick inserted into the center comes out clean. The edges should be set, but the center should still have a slight bounce—this indicates perfect doneness. If the tops brown too quickly, tent the pans with aluminum foil to prevent over-browning.
Remove the cakes from the oven and let them cool in the pans for 10 minutes. Then transfer them to a wire rack to cool completely. This cooling step is crucial—it allows the cakes to set properly and prevents the frosting from melting when you add it later. For best results, let them cool for at least 1 hour before frosting.
Make the Homestyle Chocolate Frosting
In a medium bowl, beat the 0.5 cup heavy cream with an electric mixer on high speed until soft peaks form. In a separate large bowl, sift the 3 cups powdered sugar to remove any lumps. Gradually add the powdered sugar to the cream while mixing on low speed, then increase the speed to medium and beat until smooth and fluffy.
Add the 1 tsp vanilla bean paste and mix until fully incorporated. The frosting should be thick but spreadable—if it’s too stiff, add 1-2 tablespoons milk to loosen it. This frosting is designed to be simple yet rich, with just the right amount of sweetness to complement the deep chocolate flavor of the cake.
Assemble and Serve
Place one cake layer on a serving plate and spread a generous layer of frosting on top. Add the second cake layer and frost the top and sides completely, creating a smooth, even surface. For a classic 1950s touch, pipe a simple border around the edges or add a dusting of cocoa powder for decoration.
Let the cake sit at room temperature for 10 minutes before slicing to allow the frosting to set slightly. Each slice should be moist with a tender crumb and a creamy, slightly sweet frosting that melts perfectly in your mouth. Serve with a glass of cold milk for the full retro experience.
Pro Tips For Making 1950 Chocolate Cake
- MEASURE BUTTER COLD (NOT ROOM TEMP): I learned this the hard way—creaming butter and sugar at 70°F turns into a greasy mess instead of light, airy batter. Wipe your butter down with a damp towel, then pop it in the fridge for 10 minutes before starting. The butter should resist denting when pressed; if it’s too soft, give it another 5.
- SIFT THE COCOA (NO LUMPS ALLOWED): That powdered cocoa? It’s a sneaky lump-maker. Sift it with the flour before adding it to the dry ingredients—this keeps your cake from turning out dense or streaky. I skip this sometimes, and the texture suffers. Trust me, the extra 30 seconds saves you from a sad, dry crumb.
- SWAP BUTTERMILK FOR SOUR CREAM (IF YOU MUST): Buttermilk’s tangy magic is hard to replace, but if you’re in a pinch, mix 1 cup sour cream with 1 tablespoon lemon juice or vinegar. Let it sit 5 minutes to curdle, then use it 1:1. The cake won’t be exactly the same—it’ll be richer—but it’ll still be delicious. (And yes, I’ve tested this after forgetting to grab buttermilk at midnight.)
Pro cooking tips for this recipe
Butter Creaming Mastery
The key to that classic 1950s texture starts with proper butter creaming. Use your stand mixer's paddle attachment and cream the 1 cup unsalted butter and 2 cups granulated sugar on medium speed for 3-4 minutes until the mixture is light, fluffy, and nearly doubles in volume. I like to scrape the bowl every 30 seconds to prevent the butter from separating. The goal is to incorporate as much air as possible—this creates the tender crumb that makes this cake legendary. If your butter isn't soft enough, microwave it in 10-second bursts until pliable but not melted. 🥛
Batter Consistency Secrets
Your batter should be thick and fudgy—almost like brownie batter. If it looks too thin after adding the buttermilk, you might need to add 1-2 tablespoons more flour. I've found that folding in the cocoa powder and chocolate chips last keeps them evenly distributed without overmixing. Overmixing develops gluten, which makes the cake tough. Use a spatula to gently fold just until combined. The batter should hold its shape when dropped from a spoon. 🍫
Baking Time Precision
Bake the cakes for 30-35 minutes at 350°F, but don't rely solely on the timer. The cake is done when a toothpick comes out clean and the edges pull away from the pan slightly. I always check at 28 minutes because ovens vary. If the tops brown too quickly, tent with foil to prevent over-browning. The center should have a slight bounce—this indicates perfect doneness. Let the cakes cool completely before frosting, or the butter in the frosting will melt and make a mess. ⏰
Frosting Texture Tips
For that perfect 1950s frosting consistency, whip your 0.5 cup heavy cream to soft peaks before adding the powdered sugar. I like to sift the 3 cups powdered sugar first to avoid lumps. Add the sugar gradually while mixing on low speed, then increase to medium. The frosting should be thick but spreadable—if it's too stiff, add 1 tablespoon milk at a time. For extra richness, chill the frosting for 10 minutes before spreading. This helps it set faster and gives a smoother finish. 💫
Layering Like a Pro
When assembling, place the first layer on your plate, then spread frosting evenly to within ½ inch of the edges**. Add the second layer, then frost the top and sides completely. For a vintage look, use an offset spatula to create swirls or pipe a simple border with leftover frosting. Dust the top lightly with cocoa powder for decoration. Let the cake sit at room temperature for 10 minutes before slicing to allow the frosting to set slightly. This prevents messy crumbs and gives you clean slices every time. 🎂
Equipment Upgrades
While you can make this cake with basic tools, a few upgrades make life easier. A KitchenAid stand mixer with the paddle attachment is perfect for creaming butter and sugar. For precise temperature control, I recommend a Thermoworks Sous Vide Thermometer to monitor oven temp. A 9-inch round cake pan from USA Pan gives even baking, and a wire cooling rack prevents soggy bottoms. For frosting, a Kitchenaid frosting spatula helps create smooth sides. These tools aren't essential, but they make vintage baking feel like a breeze. 💡
Nutrition facts
Frequently asked questions
Why does this 1950s chocolate cake recipe use buttermilk instead of regular milk?
The buttermilk adds acidity that reacts with the baking soda, creating air pockets for a lighter texture while keeping the cake incredibly moist. It also enhances the chocolate flavor and prevents dryness—classic 1950s bakers swore by it for that perfect tender crumb. If you're short on time, mix 1 cup milk with 1 tablespoon vinegar and let it sit for 5 minutes.
Can I substitute cocoa powder with melted chocolate in this recipe?
Yes, but adjust carefully! Replace the 0.75 cup cocoa powder with 0.375 cup melted semisweet chocolate (about 3 ounces). The melted chocolate will make the batter thicker, so you may need 1-2 tablespoons extra flour to maintain the right consistency. The flavor will be richer but slightly more intense—great for chocolate lovers!
How do I prevent my cake from cracking when frosting?
Let the cakes cool completely before frosting—this is critical! Warm cakes release moisture that can cause the frosting to melt and create cracks. Also, make sure your frosting is at room temperature and spread it evenly, leaving a ½-inch border unfrosted on the sides. Chill the assembled cake for 10 minutes before slicing to help it set.
What's the best way to store leftover 1950s chocolate cake?
Keep the cake in an airtight container at room temperature for up to 3 days, or freeze for 2 months. The frosting can be made ahead and stored separately in the fridge for 1 week—just whip it back up before serving. For a quick refresh, dust the top with a little powdered sugar to cover any weeping. The cake actually tastes better the next day as flavors meld!
Can I make this cake in a different pan size?
Yes, but adjust baking time accordingly. For a 8-inch pan, reduce time by 5-7 minutes (bake for 25-28 minutes), and for a 10-inch pan, increase by 5-7 minutes (bake for 35-40 minutes). Use a toothpick test to check doneness—it should come out clean. The cake height will vary, but the texture will stay the same if baked properly.