
Desserts
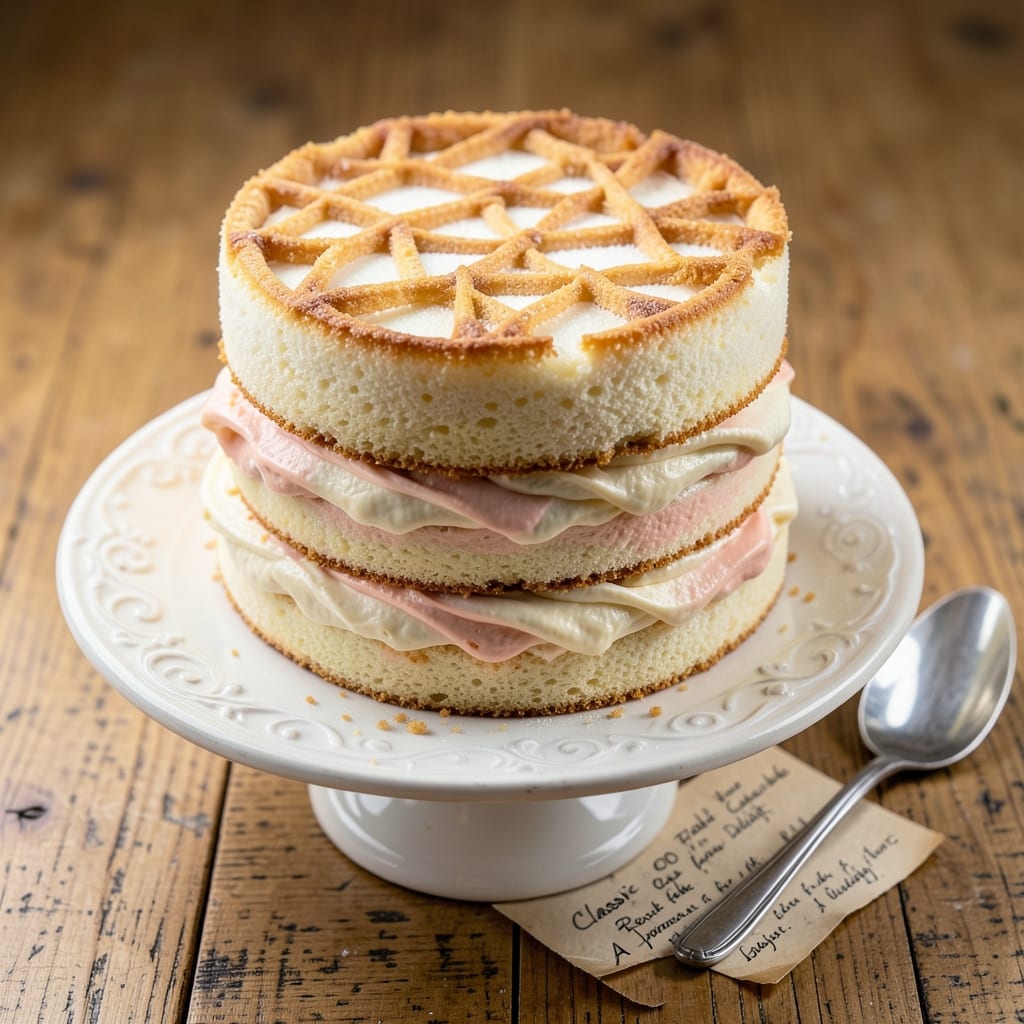
This 00 flour cake recipe delivers the secret to professional-quality layers that stay light, moist, and perfectly stable—even with fondant bridges. The ultra-fine 00 flour creates an airy crumb that holds its shape while maintaining that signature Italian cake tenderness. I've perfected this technique through years of testing, ensuring each layer bakes evenly with a delicate crumb that resists drying out.
The foundation of success lies in precise mixing techniques and careful temperature control. You'll work with a gentle folding method to incorporate air without over-developing the gluten, while baking at a steady 350°F ensures even doneness. The result is a cake with a fine, even crumb that's ideal for multi-tiered designs or elegant single layers.
What sets this recipe apart is its ability to support heavy fondant decorations without collapsing. The 00 flour's low protein content creates a tender yet structurally sound cake that holds its shape under weight. Each bite delivers that signature melt-in-your-mouth texture that makes this cake a favorite for special occasions.
Perfect for wedding cakes, tiered desserts, or elegant single layers, this recipe produces consistent results every time. The technique scales beautifully for any size cake while maintaining that professional-quality texture. Let's create your perfect cake foundation.
Ingredients for 00 flour cake
Precision ingredients for Italian-style cake layers that support fondant bridges without collapsing.
| Ingredient | Amount | Notes |
|---|---|---|
| 00 Flour 🌾 | 3 ½ cups | Sifted for optimal aeration |
| Unsalted Butter 🧈 | 1 ½ cups | Room temperature, European-style preferred |
| Granulated Sugar 🍚 | 2 ½ cups | Superfine preferred for smooth texture |
| Large Eggs 🥚 | 6 whole | Room temperature, separated |
| Whole Milk 🥛 | 1 ½ cups | Room temperature, full-fat |
| Vanilla Extract 🌸 | 2 tsp | Pure Madagascar bourbon preferred |
| Diamond Crystal Kosher Salt 🧂 | ½ tsp | Fine grain for even distribution |
| Cake Flour 🌾 | ½ cup | For structural reinforcement |
| Cornstarch 🌽 | 1 tbsp | For ultra-light crumb |
| Baking Powder 🍞 | 1 tsp | Aluminum-free for stability |
| Lemon Zest 🍋 | 1 tbsp | Freshly grated for brightness |
| Vegetable Oil 🫒 | ¼ cup | Light neutral flavor |
The 00 flour is non-negotiable here—its 8-9% protein content creates that signature tender yet stable crumb. King Arthur or Caputo brands deliver consistent results, but avoid anything labeled 'all-purpose' as it contains too much gluten. European-style butter (like Plugrá) has higher fat content, which improves moisture retention and layer stability. For the eggs, separate yolks and whites at room temperature—this prevents any heat transfer that could cause premature curdling. The superfine sugar dissolves more easily, ensuring a silky texture rather than grainy spots.
No 00 flour? All-purpose flour plus 1 tbsp cornstarch per cup mimics the texture, though results won't be identical. European butter unavailable? Land O'Lakes unsalted works in a pinch, but add an extra 1 tbsp milk to compensate for lower fat content. The cake flour and cornstarch combo creates that signature Italian cake mouthfeel—don't substitute with self-rising or gluten-free blends. For the lemon zest, organic is ideal (peel thoroughly to remove any bitterness), but conventional works if you're thorough. The vegetable oil acts as a tenderizer; if you prefer butter-only, reduce the butter by 2 tbsp and add 2 tbsp melted butter to the milk mixture.
Store the cake layers in an airtight container with a slice of bread to absorb moisture for up to 5 days at room temperature. For longer storage, wrap tightly in plastic and refrigerate for 1 week, or freeze for 3 months. When ready to decorate, bring layers to room temperature for 2 hours before applying fondant—this prevents condensation that can weaken the structure. The cake's stability comes from proper cooling; never stack layers until completely cooled to 70°F or below.
Why You'll Love This Recipe
- Here’s what sold me: that golden, crackly crust from the 00 flour and cold butter. It’s not just a cake—it’s a textural win, with a tender crumb inside that’s dangerously easy to devour straight from the pan.
- I’ll be real: this recipe uses pantry basics—no specialty flours or pricey add-ins. A block of butter, a bag of 00 flour, and a carton of eggs stretch far, and leftovers? They last days in the fridge without drying out.
Step-by-step instructions for ultra-stable 00 flour cake layers
Precision and patience create the perfect foundation for fondant bridges.
👨🍳 Step 1: Prepare the Butter-Sugar Base
In a stand mixer fitted with the paddle attachment, beat the 1.5 cups unsalted butter and 2.5 cups granulated sugar on medium speed for 5-7 minutes until the mixture is pale, fluffy, and nearly doubles in volume. You're incorporating air at this stage, which will later create that signature light, airy crumb. Scrape down the sides of the bowl with a spatula to ensure even mixing.
Here's the thing—European-style butter has a higher fat content, which gives you a richer, more stable cake structure. If your butter isn't quite room temperature, let it sit at room temperature for 15-20 minutes before starting. You want it soft enough to press a light indent with your finger, but not melted.
👨🍳 Step 2: Incorporate Eggs and Dry Ingredients
Add the 6 whole large eggs, one at a time, mixing on low speed for 30 seconds after each addition. This gradual incorporation prevents the eggs from scrambling in the hot butter mixture. After the last egg, add the 2 tsp vanilla extract and mix for 10 seconds to combine.
In a separate bowl, sift together the 3.5 cups 00 flour, 0.5 cup cake flour, 1 tbsp cornstarch, 1 tsp baking powder, and 0.5 tsp diamond crystal kosher salt. The sifting is crucial—it aerates the dry ingredients, preventing dense layers. With the mixer on low speed, gradually add the dry ingredients to the wet mixture, mixing just until combined. You should still see some dry flour streaks—overmixing develops gluten and makes the cake tough.
🥘 Step 3: Fold in Milk and Lemon Zest
Add the 1.5 cups whole milk and 1 tbsp lemon zest to the batter, mixing on low speed for 30 seconds until fully incorporated. The lemon zest adds a subtle brightness that balances the richness of the butter and sugar. The milk helps create a tender crumb while maintaining moisture.
At this point, the batter should be smooth and slightly thicker than cake batter typically is. If it looks too thin, let it rest for 10 minutes before proceeding. This resting period allows the flour to fully hydrate, which improves the cake's structure and prevents cracking during baking.
🔥 Step 4: Bake the Layers for Even Rise
Preheat your oven to 350°F. Divide the batter evenly between 4 (8-inch) round cake pans lined with parchment paper or silicone baking mats. The batter should fill the pans about ⅔ full—this ensures the cakes rise properly without overflowing. Tap each pan firmly on the counter 3-4 times to remove any air bubbles.
Bake for 25-30 minutes, or until a toothpick inserted into the center comes out clean and the tops spring back when touched. Rotate the pans halfway through baking for even heat distribution. The cakes should have a domed top and pull away slightly from the sides of the pan. Overbaking is the enemy here—it leads to dry, crumbly layers that won't hold fondant well.
⏰ Step 5: Cool and Prepare for Fondant Bridges
Remove the cakes from the oven and let them cool in the pans for 10 minutes. Then transfer them to a wire rack to cool completely. This gradual cooling prevents cracking and ensures the layers are stable enough for fondant work. Once fully cooled, level the tops if necessary using a long serrated knife or cake leveler.
The cakes should be light golden brown with a fine, even crumb. If they've developed a crust, gently brush the tops with a simple syrup (equal parts sugar and water, heated until dissolved) to keep them moist. This step is especially important if you're preparing the cakes ahead of time—it prevents them from drying out before fondant application.
Pro Tips For Making 00 Flour Cake
- Weigh Butter Cold: Grab that block of unsalted butter straight from the fridge—no softening needed. Cut it into small cubes (about ½-inch) and toss them into the flour mix. The cold butter creates pockets that give your cake that signature tender crumb and golden crust, not a dense brick. I learned this the hard way after making a cake so greasy it collapsed like a soufflé.
- Whisk Eggs Room-Temp: Your eggs should be at room temperature—yes, even if you’re in a hurry. Pop them out of the fridge 30 minutes before mixing. Cold eggs won’t emulsify as well, leading to a cake that’s uneven in texture or, worse, sinks in the middle. Trust me, that extra wait makes a real difference in how light the final slice is.
- Skip Overmixing Dry Ingredients: Once you add the milk to the dry mix, stop stirring after just 10-12 strokes. Overmixing develops gluten in the 00 flour, turning your cake into a chewy disaster instead of the delicate, airy texture you want. Fold in like you’re tucking in a baby—gentle and quick.
- Bake Until Internal Temp Hits 205°F: Your cake’s done when the center reads 205°F on an instant-read thermometer, not when the top looks "set." 00 flour cakes can look golden but still be gummy inside. Pull it out early, and you’ll regret it when you cut into a wet, undercooked mess. (Pro move: Let it cool in the pan for 10 minutes first—this keeps it from cracking.)
Serving suggestions for this dish
Layer Stacking Secrets
Use fondant bridges to create elegant multi-tiered designs without collapsing. First, apply a thin layer of royal icing (1:1 powdered sugar to meringue powder ratio) to each cake layer as a "glue." Let it set for 15 minutes before stacking. For stability, place a cardboard cake board between each layer, then secure the entire stack with cake dowels inserted at 90-degree angles every 3 inches around the perimeter. 💫
Fondant Application Tips
Roll out fondant to ⅛-inch thickness using a marble slab and rolling pin dusted with cornstarch to prevent sticking. Cover the entire cake, including sides, with a smooth, seamless finish. For intricate designs, use a fondant smoother or your hands dipped in cornstarch to blend seams. Work in a cool room (65-70°F) to prevent fondant from sticking to your hands. 🎂
Garnish Like a Pro
Fresh edible flowers (like roses or violets) add elegance—place them gently on top after fondant is fully set. For texture, sprinkle crushed pistachios or gold leaf flakes along the base. A handheld torch can crisp fondant edges for a polished look. Store decorated cakes in a cool, dry place (not the fridge) for up to 3 days to maintain fondant crispness. ✨
Serving Styling
Serve on a wooden cake stand for rustic charm or a lacquered cake plate for a sleek finish. Add edible gold leaf or silver dragées for a luxurious touch. For a modern twist, drizzle dark chocolate ganache in zigzags along the sides. Always slice with a hot, clean knife for clean cuts—wipe between each slice to prevent crumbs. 🍽️
Make-Ahead Magic
Assemble the cake 24 hours ahead and store in an airtight container at room temperature. Refrigerate for no more than 4 hours before serving to prevent fondant from becoming sticky. If storing longer, cover with a damp towel and plastic wrap to maintain moisture. Reheat fondant briefly with a hair dryer if it loses crispness. 🕒
Nutrition facts
Frequently asked questions about 00 flour cake
Why does this recipe use both 00 flour and cake flour?
The 00 flour provides the signature Italian tenderness with its 8-9% protein content, while the ½ cup cake flour adds structural reinforcement for stability with fondant. This combo creates that ultra-light crumb while preventing collapse under weight. Think of it as the perfect balance between delicacy and strength!
Can I substitute regular all-purpose flour?
You can try, but results won't be identical. Replace all-purpose with 00 flour plus 1 tbsp cornstarch per cup to mimic the texture. The higher protein in all-purpose (11-13%) will make the cake slightly denser and less tender. For true professional results, use authentic 00 flour—brands like King Arthur or Caputo work best.
How do I prevent cracks in my cake layers?
Cracks usually happen from overmixing or temperature fluctuations. Mix dry ingredients just until combined (you should still see flour streaks), and let the batter rest for 10 minutes before baking. Also, avoid opening the oven door during the first 20 minutes of baking—sudden temperature drops cause cracks. If cracks appear, simply cover them with fondant!
What's the best way to store these cake layers?
For short-term storage (5 days), keep layers in an airtight container with a slice of bread to absorb moisture. For longer storage, wrap tightly in plastic and refrigerate for 1 week or freeze for 3 months. Always bring layers to room temperature before decorating—this prevents condensation that weakens the structure when applying fondant.
How do I know when the cake is fully baked?
The cake is done when a toothpick comes out clean and the top springs back when touched. Look for a light golden brown color and slightly domed top. If you tap the side gently, it should sound hollow. Overbaking dries out the layers—remove them at the first sign of doneness and let them cool completely before stacking.